


Welcome back!
We’ve got a large space dug up in the hill, we have got some paving next to the house, we even have a nice foundation so it is time to build a wall!
We started by getting a large delivery of sand, gravel and concrete cell blocks. Until now we have gone to the DIY store and bought individual bags of sand, gravel, cement and even blocks. The big issue with doing it like this is that we can only take about ten bags at a time in our car, we used them very quickly (especially with the foundation) and it is very expensive. So instead, this time we looked at getting a large delivery. R did most of the work of looking online and finding what we needed. In the end, we ordered one big bulk bag of sand, one big bulk bag of 20mm gravel, 50 concrete cell blocks and six bags of cement.
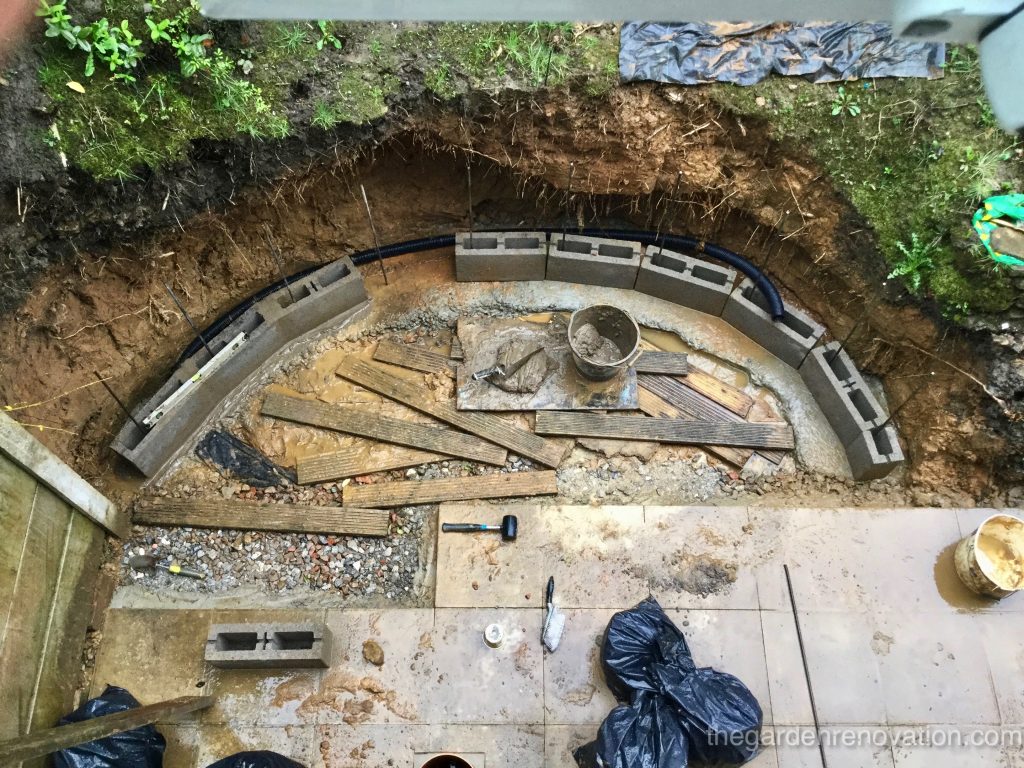
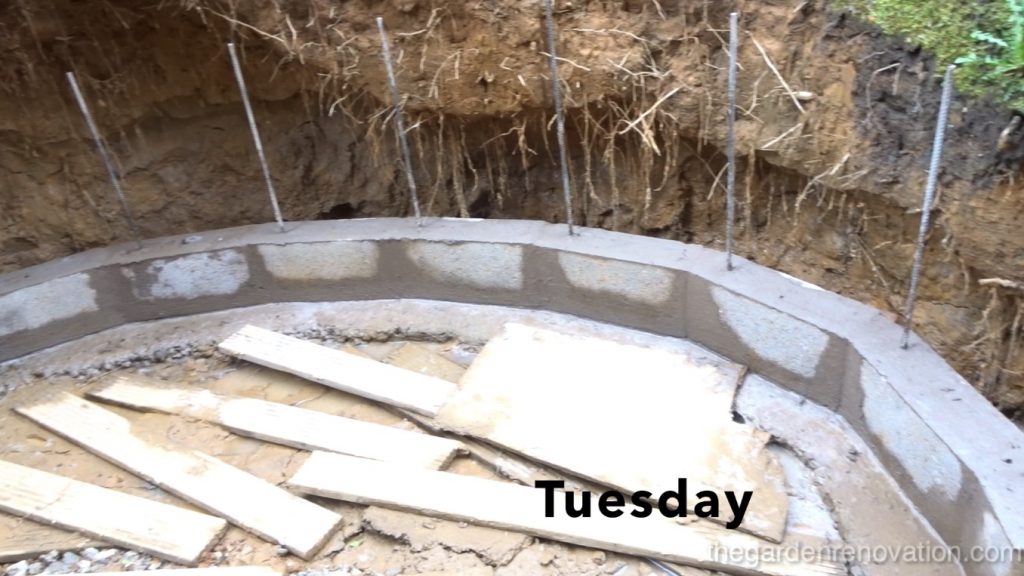
The first thing we had to do was plan out the blocks in an arc in a way that the steel rebars would fit in the hollow area of the cell blocks. Unfortunately, we had a couple of complications. One, we had cell blocks instead of hollow blocks which means the bottom of the block is closed. We knew about this when we bought and our strategy was to drill a hole at the bottom that would accommodate the rebar. G was sceptical that it would be easy to make a hole but then he was very happy to be proven wrong on the first attempt. The second issue was with the positioning of the rebar. We had tried to measure accurately each time we placed a rebar into the foundation accounting for the mortar that would go in between the two blocks, but still, we were off by a couple of centimetres. This meant that the rebar would sit closer and closer to the edge each time a block was placed. To adjust things a little, we moved all the blocks slightly to the left, however, this meant more drilling into the block for G because originally he had drilled quite a small hole that did not allow much room for movement. For the second round of drilling, G made several holes at the base of the block and then used a hammer to break through the base of the block to create a wide opening that would allow a lot of room to move the block around and adjust it freely. This did not take too much time and proved to be very useful, because the blocks had to be adjusted slightly each time one was placed. Once the 1st row of blocks was placed and planned out, we did a dry test fit and we were happy with the positioning (not that we had too much choice now that we had a foundation and rebars!!). We did have to cut one block with the angle grinder since the arc could only fit 9.5 blocks but this was not a problem.
By now we had made a couple different types of concrete mixes. YouTube and the general internet was now telling us that to fix the blocks into place, we needed a concrete mix that is commonly referred to as mortar. The bag of cement we got stated that 1 part of cement and 3 parts of sand would make a strong mortar mix. With 1 part of cement and 5 parts of sand we could also have a standard mortar mix. G decided to go for 1 part of cement and 4 parts of sand, only because this was much easier to measure with the buckets we had (by doing 2 buckets of sand and 0.5 a bucket of cement).
The first batch ended up being too runny, originally it was probably fine, but as the batch was just finished it started pouring down with rain making it more and more liquid. Even if it was not the optimal consistency (not that we really know what that is since it is the first time we try this!) laying the mortar and blocks on top of it was not too hard. Actually, it was easier than G had anticipated from what we had heard from friends. It took time and patience to get the right level but it was not hard. The only issue that we ran into with the first level of blocks was that the foundation was not as level as it could have been. Starting from the far left and leaving about 1-2 cm of mortar to place the block on…by the time G got to the far right, the block was not level and there was barely any mortar at the bottom. G decided it was better to leave the block a little uneven but have mortar holding it to the foundation, and be hopeful that it would be possible to correct it later on the second level.
We made a decision to fill the back of the wall at the same time as we are going up, so we would complete one level of blocks and then backfill enough for one level, and so on. In order to do so, G joined the drainage pipe to the area we had left open, made it go through the foundation tunnel we had left and then behind the wall. As before, we surrounded the pipe in fabric to prevent dirt coming through and blocking the pipe. G used the mortar from the blocks to seal up the foundation gap and then simply placed the block on top of it. To backfill behind the blocks we used the 20mm gravel we bought, but before we gave it a quick wash to get rid of most of the fine dirt particles and then just covered the pipe so that the water coming from the hill would have easy access to the flow down towards the pipe and out of the wall.

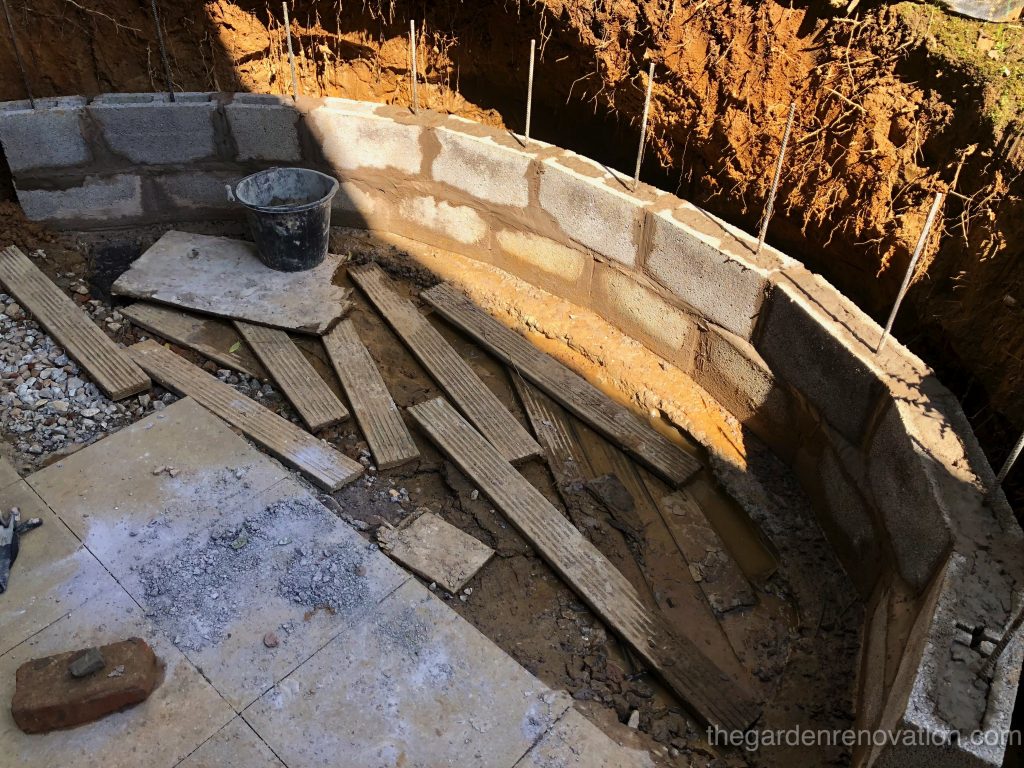
Some of the space behind the wall was quite wide, so we reintroduced clay that previously collapsed. This was to keep the gravel drainage consistent. Once the gravel was almost level with the first layer of blocks we could continue to start the second level of blocks. Before laying the second level we needed to fill the empty spaces in the blocks. For that task, we used the same mix as for the foundation. This seemed to work well. Laying the second level of blocks was very similar to the first one; we first did a dry test fit but this time, we have also staggered the blocks to add structural strength. G was able to correct the issue with the level on the right-hand side and we did not encounter any more issues.
Just like that we now had a two blocks high curved wall !
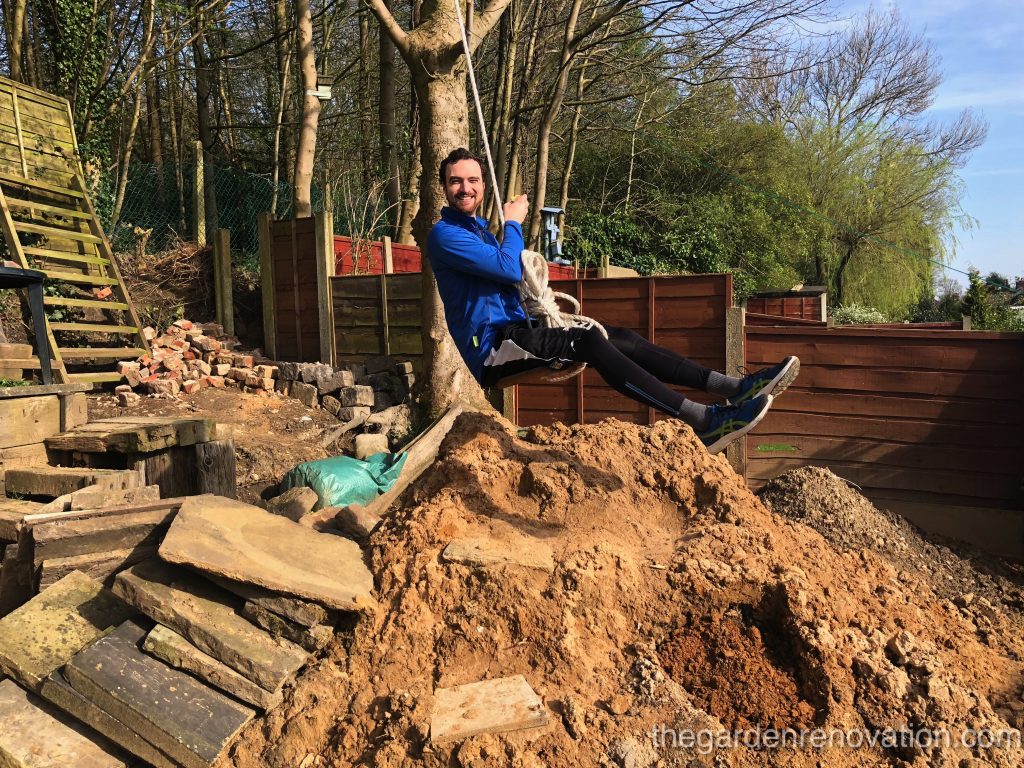
And when the sun was out, G double-checked that even with the pile of rubbish and dirt we gathered we can still use our DIY garden swing! 🙂
See you next time!
To view the next article click here Weekend 14 – Garden Retaining Wall #1 is up!