


Welcome back after a super long break!
What can we say…it started with Monday the 7th of May bank holiday and after that we became lazy and spoiled by weather all together! But that absolutely does not mean that we did not do anything – quite the opposite! We have been spending all our free time in the garden and moreover, for the past 3 weeks, it was not just us – we had 1-3 friends helping us in the garden. Helping hands are always appreciated, especially when you have a pile of clay to remove!
For the past two weeks, we all started or continued work on different parts of the garden.
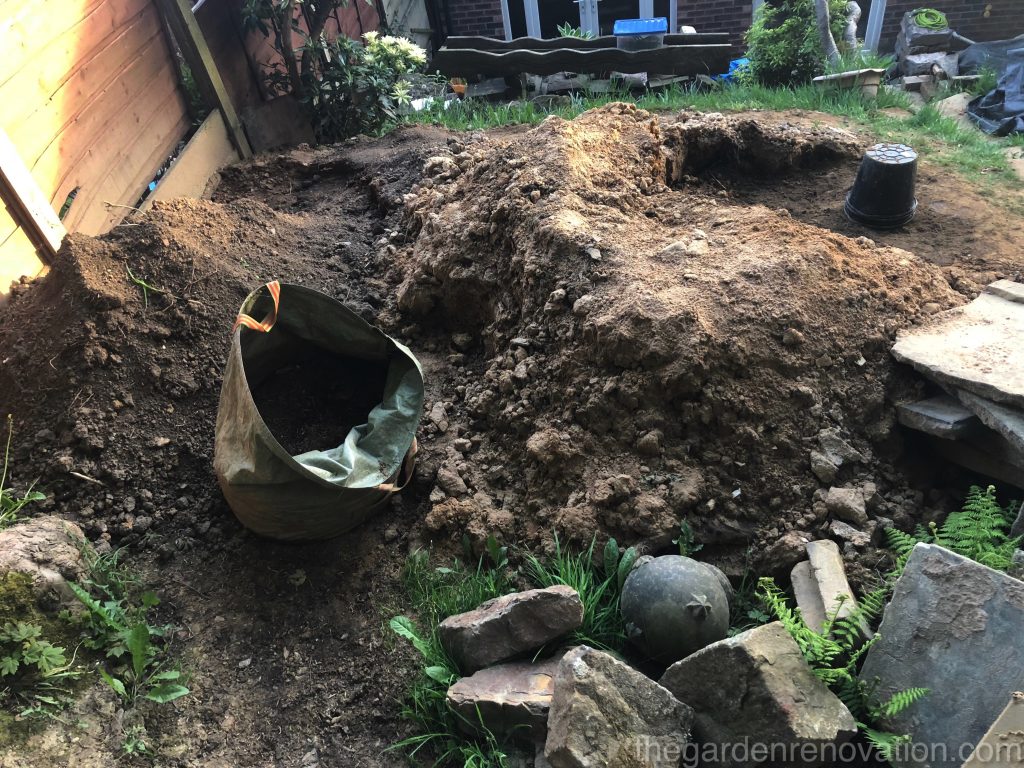
Our main goal was to get rid of the clay we had lying on our lawn/sitting area since November! Since the weather started getting nicer, the fact that we did not have anywhere to sit and have a meal or a BBQ became slightly.. unbearable 😛

At a peak time, we had three friends helping us to shovel all the dirt into buckets from the back of the garden to the 1 tonne bags in the front garden. In our small car, we can only fit about 9 small heavy duty black bags of clay and this being very inefficient – we decided it would be a good idea to hire a van for Saturday. This appeared to be quite a challenge as surprisingly everyone needs a van! The rental place had none to rent to us… but to keep the long story short, we kept on calling the rental place until at 3pm they said they had a van! Hurray!!
Within 30 min, we were picking up our van which was available to us for the next 24h (G bravely tackled the driving part..). During that weekend, in total we moved 7 one-tonne bags from the front of our garden. We have obviously explored other options of removing the dirt from our property and the prices for these started at 110 pounds per tonne! We had 7 at the time, and that turned out to be merely half of what we really had in the garden and still have to remove. Keeping that price in mind, we searched for other solutions and went for a van which permitted us to take 36 small heavy duty bags of clay at the time which was quite an improvement in efficiency. Worth mentioning that most of our time was consumed by shovelling the dirt from the jumbo bags to small black bags – this is one of the reasons why you cannot see us much in the video as well – we were at the front garden shovelling the clay and taking it to the skip!
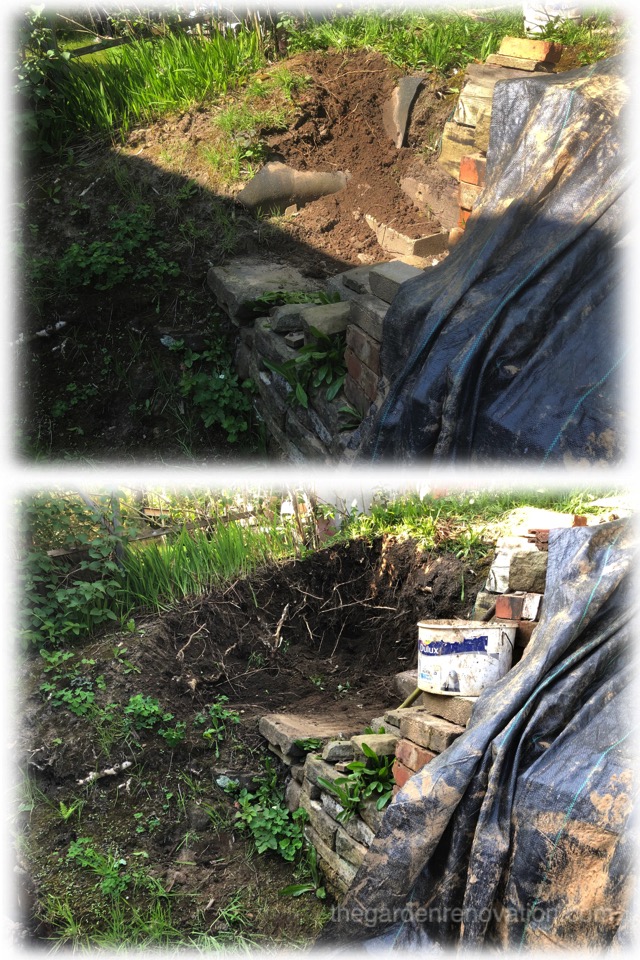
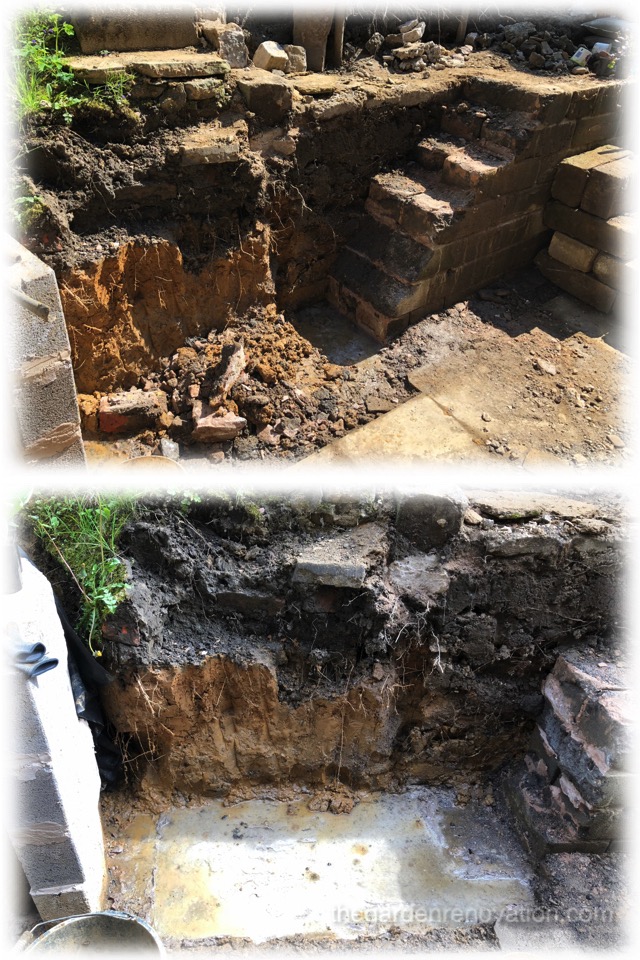
Other bits and pieces we started on included removing the dirt from the slope on the left hand-side of the garden (from above the new curved wall). This one was tackled entirely by our friend who came in and started one weekend and then continued when he came over for the second time 🙂 This is a very important piece of work as once we have it cleared against our neighbour, we will be able to put a concrete post and slot the concrete slabs between the two post. This will allow not only to put a piece of wooden fencing to separate our gardens but also hold our neighbour’s dirt from falling into our garden.
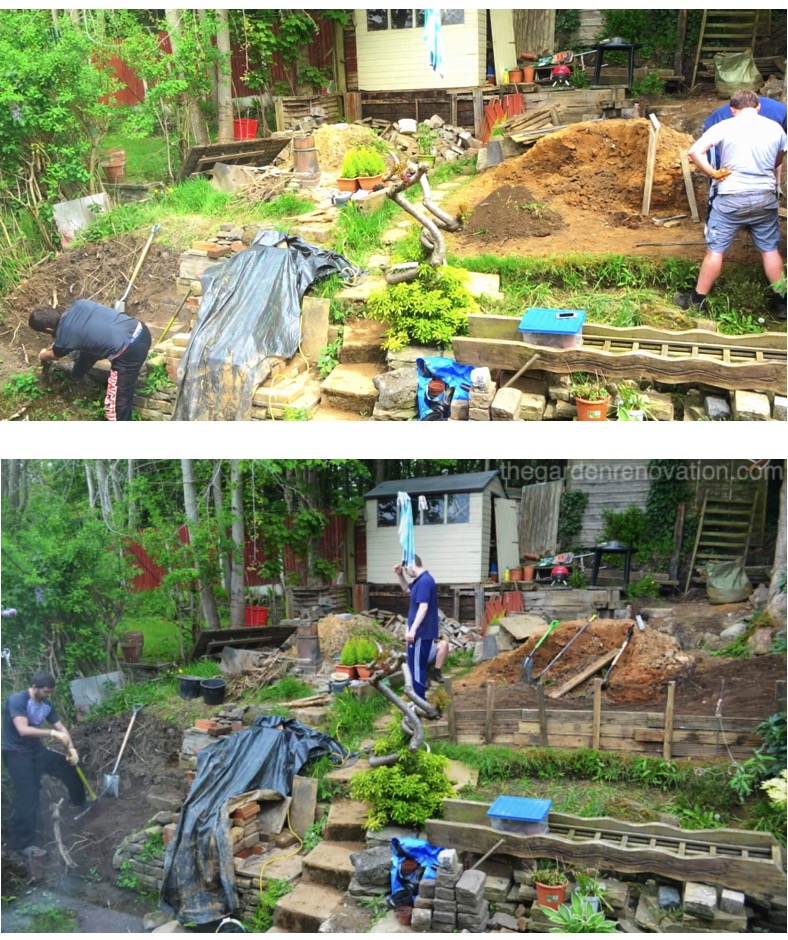
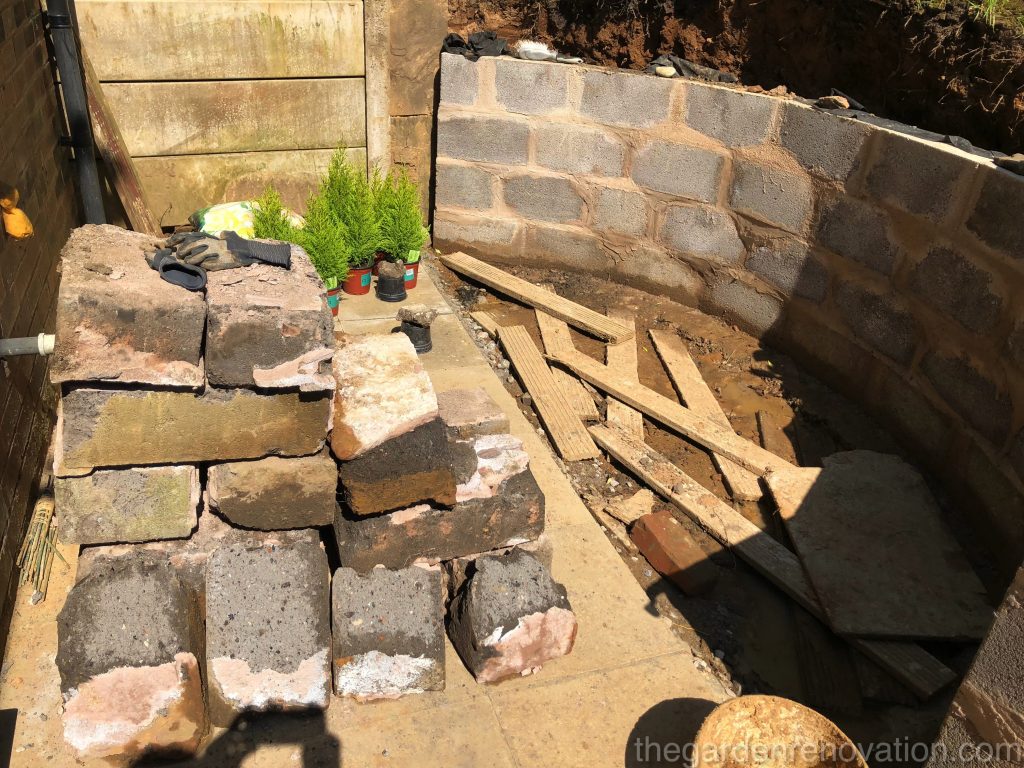
You might also see from the video that two of our friends build a supporting structure from our old decking planks – this is not explained in the video but it is meant to serve as a temporary support for new dirt so that we can try and level our sitting area. As you may remember, one of the goals was to try and collect as much dirt as possible at the top of the garden as we needed to level the area – this was the original reason behind stacking all clay in there but as time showed, we realised we not only have too much now but we could also exchange that for much nicer dirt (one that is capable of draining water at least!). We brought some and will be brining more of the nicer dirt from the slope of the garden (where our friend dug) and we can also source it from the platform for the shed as this is to be flat in our design as well.
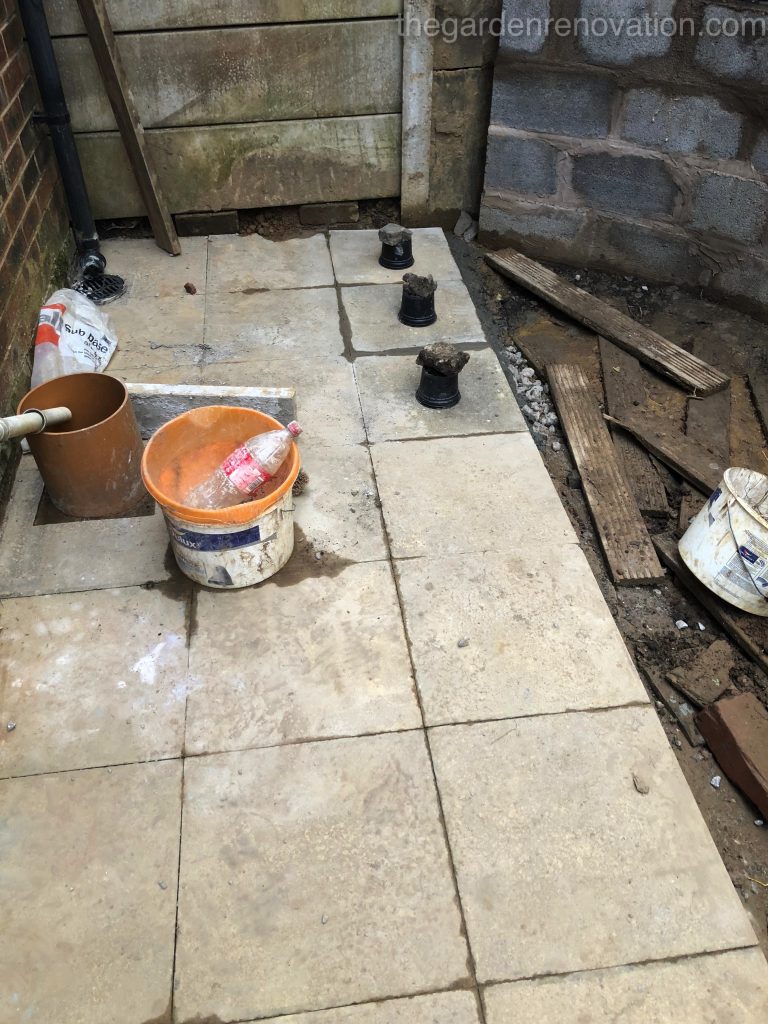
If you have been following us, you will also know that we completed most of the paving, but left three slabs at the far left because we wanted to complete the nearby drainage beforehand. We extended the drainage in the last couple of weeks which meant we were now able to complete placing all the slabs.
The sub-base for those three slabs was not quite to the right level, so G added some more sub-base to make sure it was all level. We used the same mix we previously used, 3 buckets of sand and 1/2 a bucket of cement. This mix seems to have worked really well for the other slabs. After a couple of days drying this mix still feels like a little soft and sandy, but after 4-5 days it becomes rock hard.
As nothing seems to go without surprises, we also ran into a minor problem when placing the last two slabs down. The dry and hard cement from the previous slabs was overhanging a little, but it was too high so it would not allow this last slab to sit nice and flush. G took a hammer and chisel to remove some of that dry concrete. It is safe to say that the mix hardened well, even if it was just a thin 2-3cm layer it was quite hard to chisel off and it did not easily break. After that, R helped spread the mix and level the slabs and we did not have much more trouble… until the very last slab. It seems to be a recurring theme that we run into issues, or maybe we just do not plan things well 😛 . The concrete fence post was not quite parallel with the slabs, the slab would not fit in the space. Fortunately for us, after facing so many problems, we are now well equipped and all we had to do is draw a 3cm diagonal line and cut the paving stone with the angle grinder. Now all pavings have been placed and it looks great 🙂 It is very nice to tick off a project from the list!
Otherwise, a fair chunk of G’s time was also taken by very much partial removal of the old retaining wall. The two rows of full concrete blocks did not even break when hit with a sledgehammer therefore they only way to take them out was to use chisel and…patience! This took absolutely forever and was ultimately finished by our friend, but helped us to make space for our first step of the new garden stairs! Opposite to what we have now, we envisaged 6 wide and straight stairs leading to mid-high of the slope. Wide for us meant that 2 people could fit at the same time and we established that to be 130cm. That weekend, after providing enough space, we also laid the foundation for the first step which was made out bricks and mortar between and on top of them.
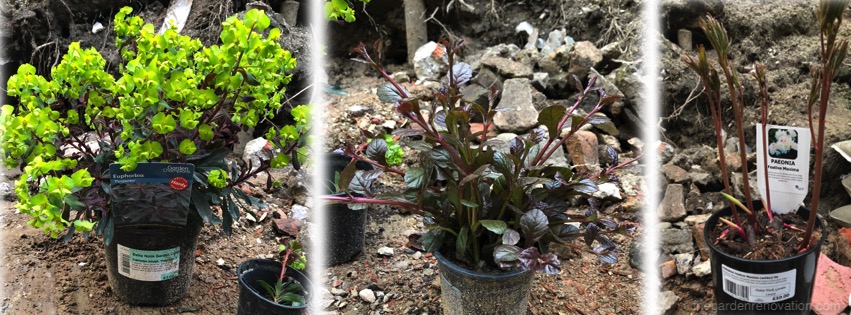
The very last project over these last two weeks was related to landscaping 🙂 We realise that the garden is still not in a state where we can allow ourselves for planting and landscaping but that does not stop us from having an occasional trip to a garden centre! Quite a long time ago now R got Eurphorbia ‘Purpurea’ and last time she also purchased a white Peony. She has also noticed that one of her crawling plant was taking over our front garden therefore, she pulled out the excess from the main plant and potted it in smaller pots – they will be perfect next year for covering the slopes 🙂
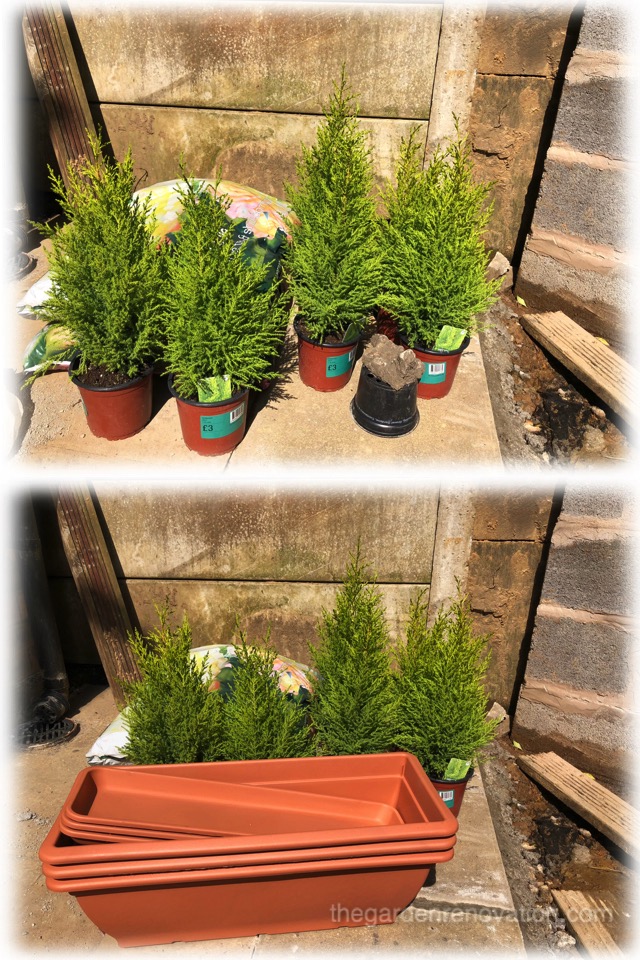
Other important purchase includes six small but beautiful Goldcrest trees with a gorgeous citrus scent. If you are interested to know why we got these and where they will go, I invite you to watch the video 🙂 Otherwise, we will explain it in the future posts.
See you next time !
To view the next article click here Weekend 17 – Our first stone mosaic garden step
I love the efforts you have put in this, appreciate it for all the great posts.
I like this web blog so much, saved to my bookmarks.