


Welcome back to another weekend of the garden renovation!
This weekend we continued digging the hillside to make room for our future retaining wall and we also undertook a side project of fixing a fence.
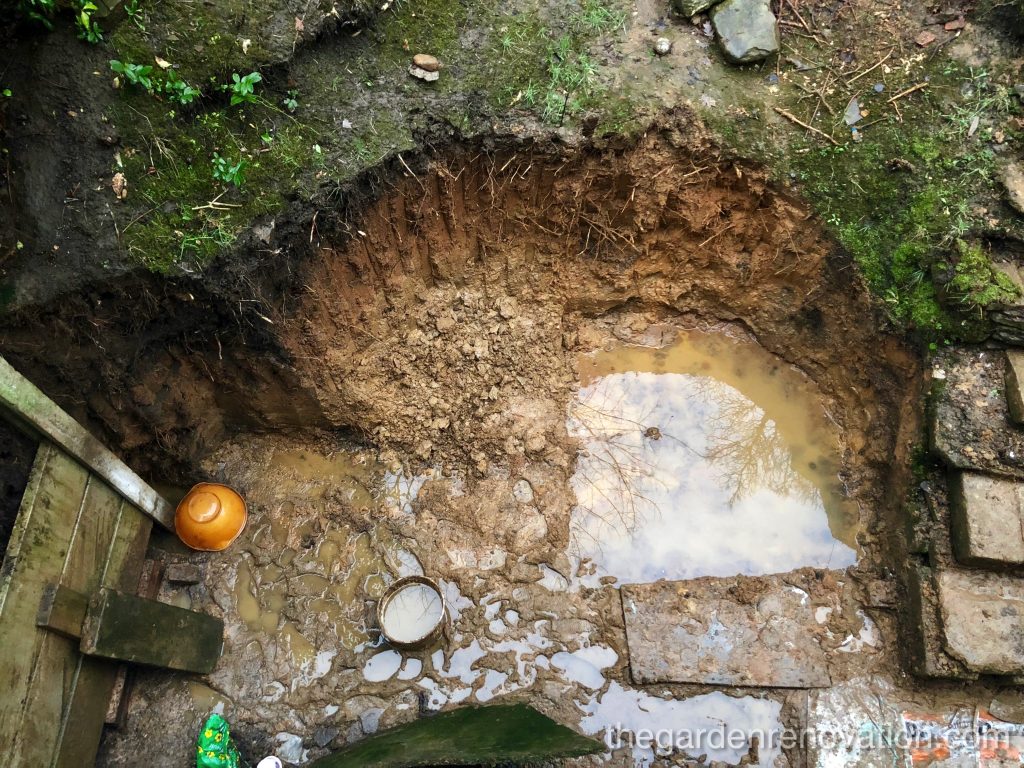
First, let me tell you how we have tried to fix our problem of standing water. You may have noticed if you follow our videos, that we get a lot of water and mud where we dig out to put the paving. It is our intention to put some drainage pipe to help drain the excess water, but we haven’t installed it yet, so all the water just seems to sit there and form puddles. R had an interesting idea to try and get rid of the water before digging some more which was to…. hoover all the water up! Sounds crazy stupid but actually, we have a wet and dry hoover and in theory, as we never tried anything like this, it should be capable of doing this; hoover water. Let me tell you, G was very sceptical but in the end R managed to convince G to at least try. She went for a small puddle at first, one that formed from a footprint in the mud. It got cleared so quickly and well that you could still see the shape of the boot in the mud! Then she moved on to larger puddles which did not seem to pose any problem either although when a lot of water goes through the hoover pipe, it shakes the whole thing about a bit. I strongly recommend watching that part of the video, it is great fun! The process of hoovering was quite exciting (but less exciting than cleaning the hoover afterwards..), which also set us up in a pretty good mood to start the day.
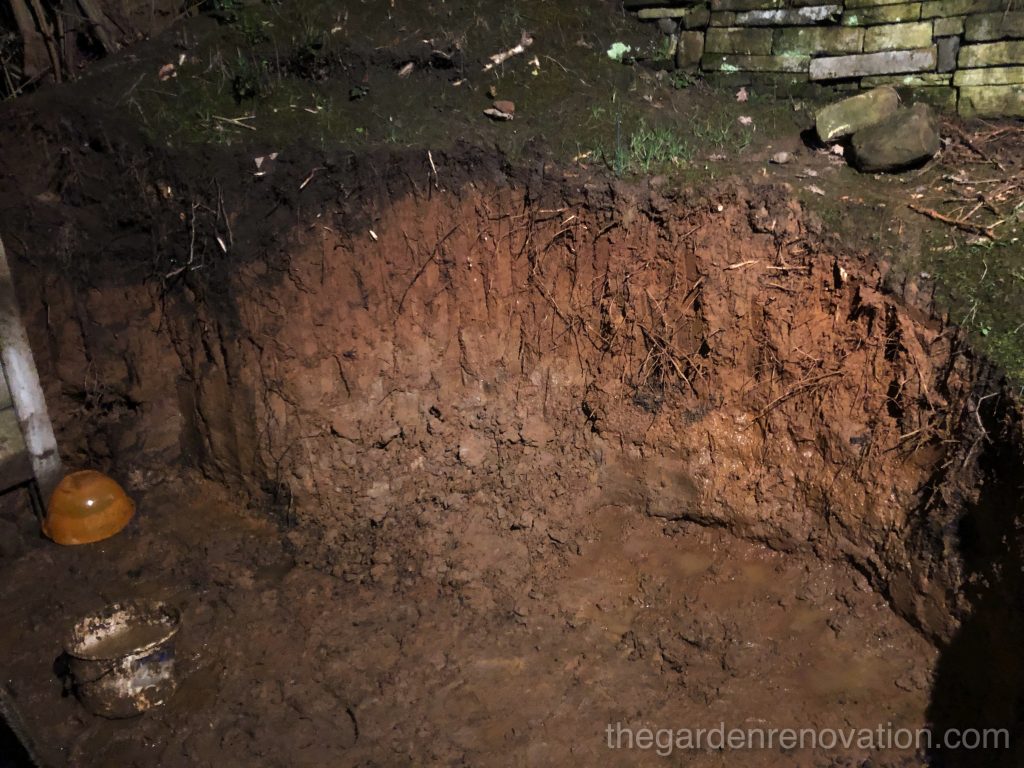
The previous weekend, we had cleared the right-hand half of the arc, but we hadn’t dug all there was to the level of the paving. R picked up the pickaxe and started deepening the arc from one side, towards the left, and G shaped the arc and dug deeper to the level we need it to be. Same as during the previous weekends, we would take turns filling the buckets and take them up the stairs. At the end of last week, we started to make a second pile of earth at the top of the garden. This one is positioned on the lawn and exactly where the ground needs to be raised and levelled. At lunchtime, we had a half circle that was the right depth and level with the paving, it felt like we were making a good progress and it was also a good stopping point for a quick lunch.
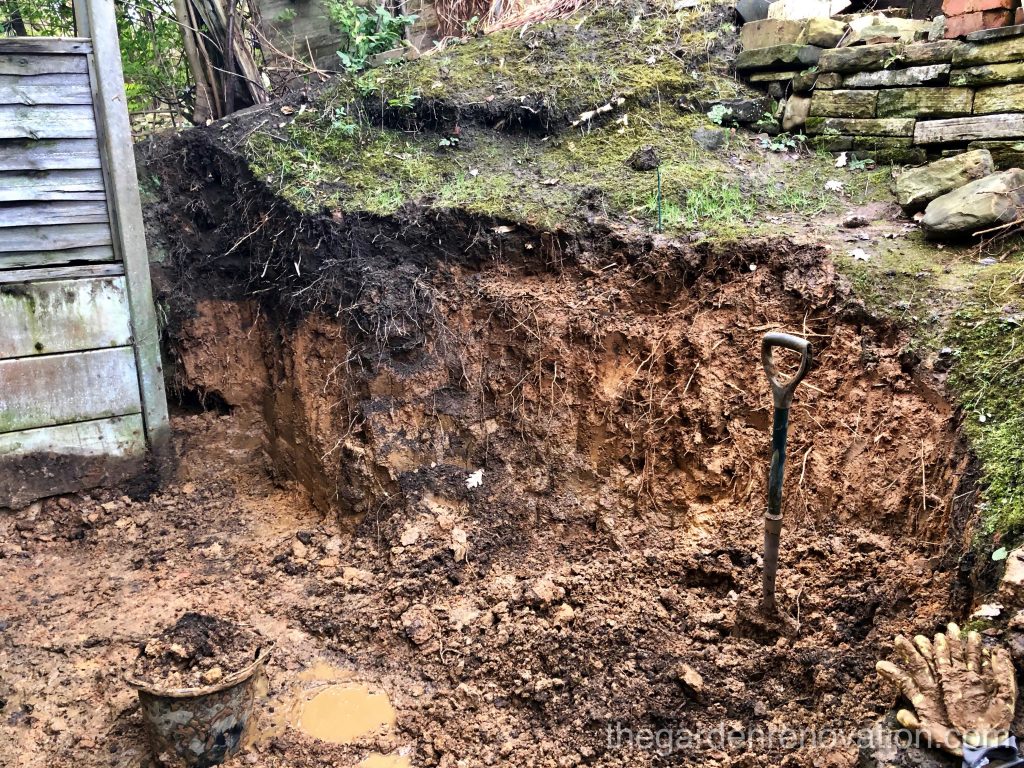
The empty, left-hand side of the arc was quickly filled with more loose dirt once we got back from lunch. We spent a few minutes taking some more measurements, with some professional tools such as red woollen yarn, and an old decking board. After a few trips with the buckets full of earth, R took a break and instead started to shift the earth pile by spreading it across the whole extent of the lawn – an attempt to level the ground. Our pile was getting so tall that it was harder and harder to empty the buckets on top.
G instead decided to clear the dirt closest to the neighbouring fence and concrete pole all the way to the level of the paving in order to have a good reference point of where the arc would start and end. Then R finished up levelling the dirt and came to help bucketing the dirt up the garden. We did this until the left-hand side of the arc was clear!
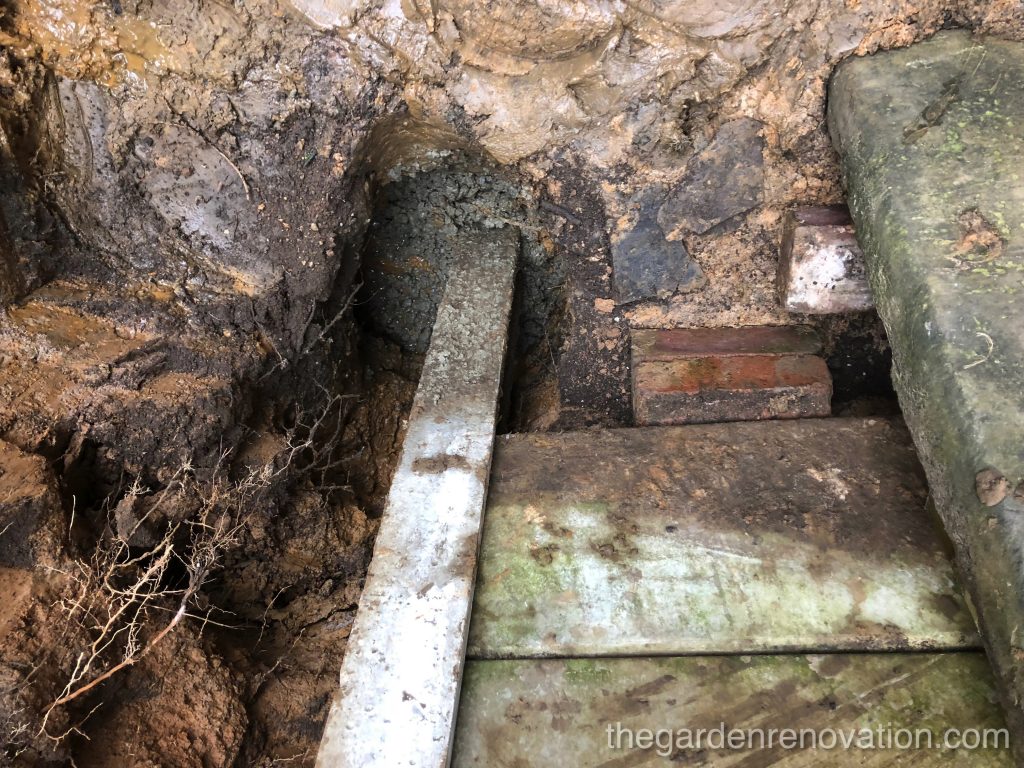
Now, before taking up the pickaxe and digging into the hillside some more, we took a look at the fence separating the neighbour and us. Calling it a fence does not quite make it justice though. Since our house has been extended at the back and our neighbour’s house hasn’t, it means that the neighbour’s garden starts sloping upwards earlier than ours. Therefore, at the edge of the house where we have the fence, our neighbour actually has over a meter of dirt already! To hold this up, two concrete posts with three long concrete slabs that slot into grooves in the posts were set up with a wooden fence sitting on top of them. We have noticed that the concrete post has now shifted – now the groove was holding slabs at 45 degrees angle (so not really holding them) and the post itself moved towards our house. It would not be very problematic actually if it was not situated so close to our retaining wall. We can only assume that the post had been pushed by the weight of the earth inwards to our plot. As a result, we had a quick chat with the neighbour to explain the situation and 30 min later (as well as two close-up inspections by our neighbour), we were working on making the post straight again and lining things up nicely. It was fairly easy to take the post and the three slabs out, even though they were extremely heavy. However, putting everything straight and back into place was going to be a job for Sunday because it was getting dark…
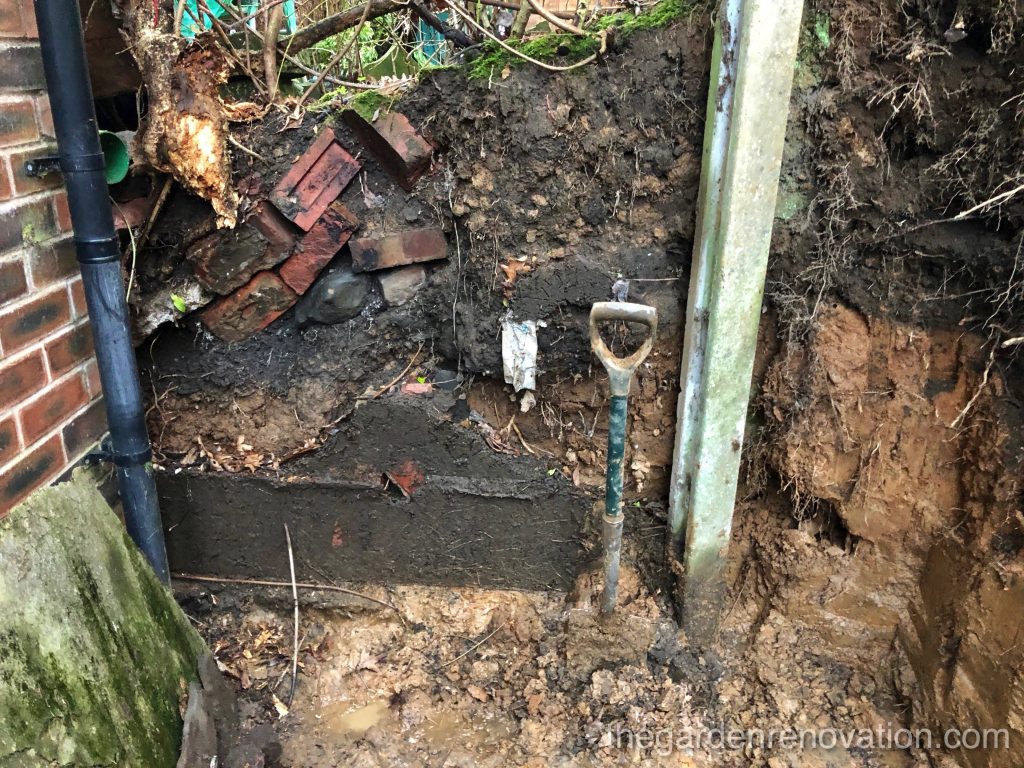
We had agreed that the first thing we would do on Sunday was to fix the fence and post. R initially thought it was going to be a 30-min job!… little did she know 😀 Since the post moved so much that it was nowhere near on the boundary of our plot, we tried to push it back as much as we could and this involved clearing the dirt, as well as cutting some small branches from the neighbour’s shrubs (all agreed with the neighbour!). We then dug a hole for the post, about 40-50 cm deep, taking into account that there would be an extra 5-10 cm of the sub-base and the paving.
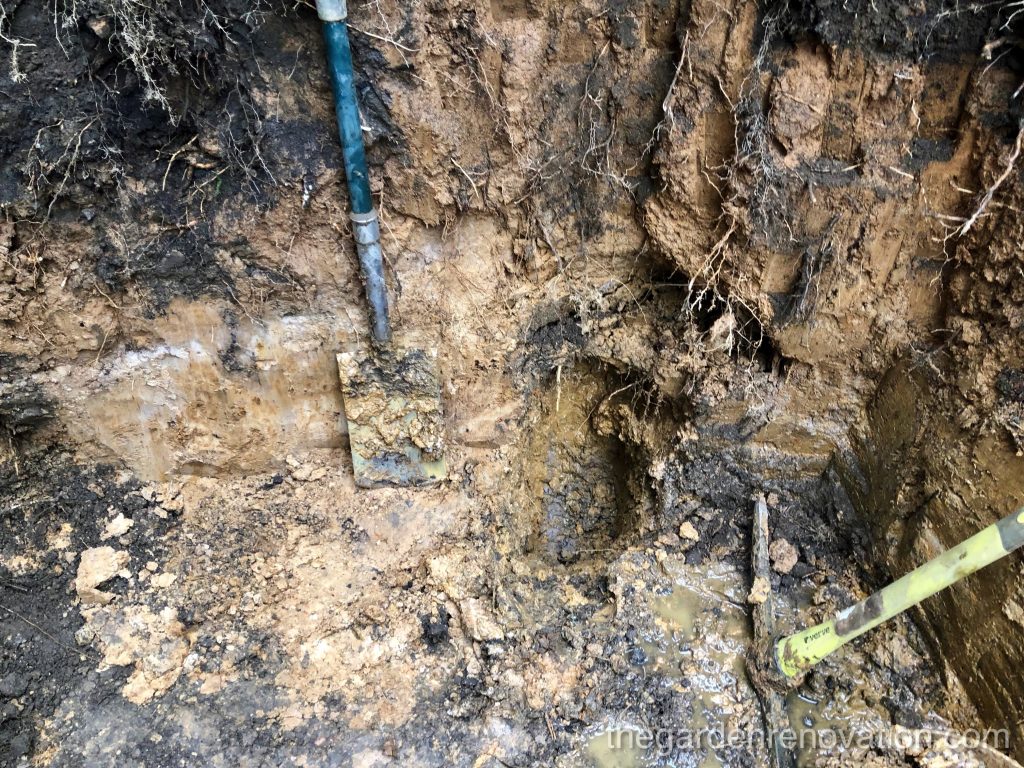
As a first step, we put the concrete slabs back by wedging in the other concrete post that we had not removed. Slotting back the slabs was extremely difficult (sooooo heavy!) but it was nothing compared with trying to slot back the post so that it actually enclosed the three slabs! We have managed to put it back in fairly easily but as the hole started to fill up with water and mud the post was sliding from one side to another but would not position where we needed it to be 🙁 The post itself must have weight 80 to 100 kg and it took us three tries to position it correctly. The time we got it about right, we made sure it was level with the spirit level and while R was holding the post, to make sure it would not fall back on us, G made a concrete mixture. We had never made concrete before, so like most things that we are doing, we checked on the Internet and YouTube to see how it was done. We found that a mix of 4 parts gravel, 2 parts sand and 1 part cement would make a strong enough concrete to hold a post of this type; or so we hope, we will find out in the future it that is true! We filled the hole partially with the mixture and partially with bricks against the post, as this was meant to help keep the post straight and true while drying. We were also concerned about the water coming up in the hole. We removed as much water as we could before pouring the concrete but 20-min after we had finished with the concrete, we already had a layer of water on top of it. We had no choice but leave it like this and hope for the best. A quick search in the evening revealed that our type of cement does not dry by evaporation by instead drying by a chemical reason and is called hydraulic cement meaning it is able to solidify even when fully submerged.
After the post and fence had been fixed, we went back to digging the side of the slope. We cleared the left-hand side of the arc and made it level with the bottom of the sub-base for the paving. This meant taking off another 5-10 cm of dirt from that area (which resulted in the accidental creation of a pond but more about this one next time…)
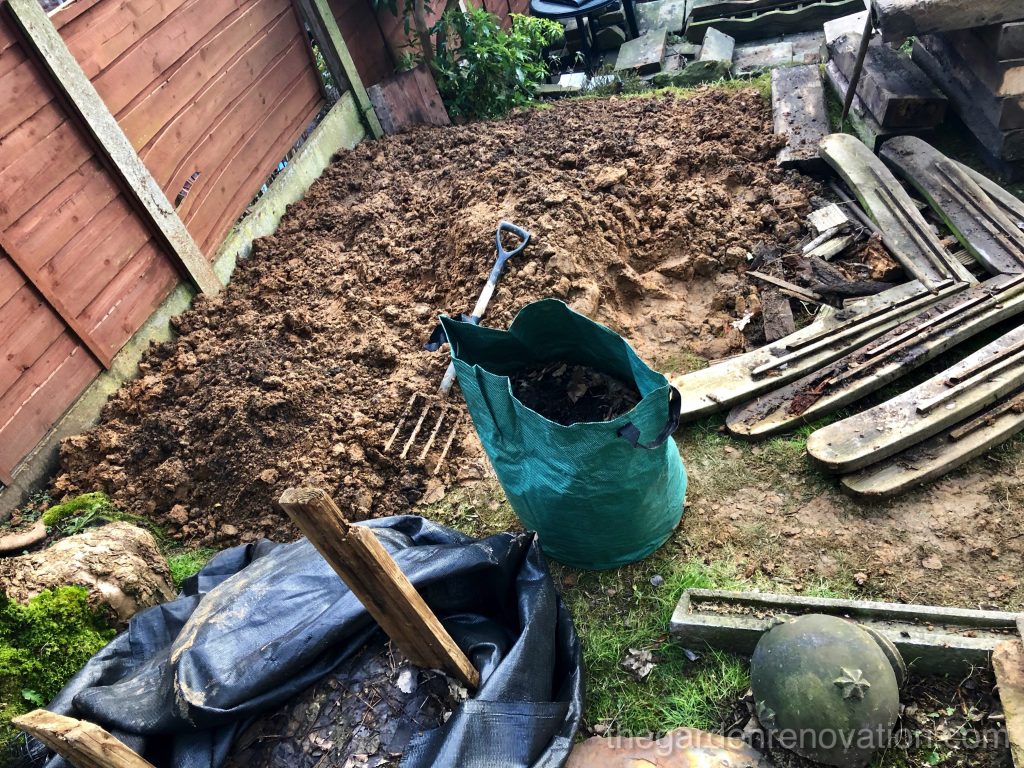
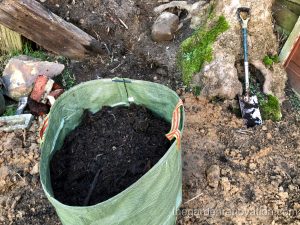 On Tuesday, R took advantage of some late-afternoon daylight and she finished removing our temporary compost. Now all four wooden posts and the black membrane are gone and our compost is split between two garden bags waiting for planting time (but it will be a while… 🙂 ).
Thanks for reading and see you next time! 🙂
To check out our next article, click here – Weekend 7 – Installing garden drainage and removing some brickwork.