


Welcome back!
We started this weekend of the garden renovation by hoovering some water. To be more specific, we hoovered away our pond. We are calling it pond for a reason. You know the moment when the evening is approaching and you are somewhere close by to a water and you start seeing a big group of flies hovering over the water – that’s what we got over that huge puddle! This time, the water also built up all the way next to the house.

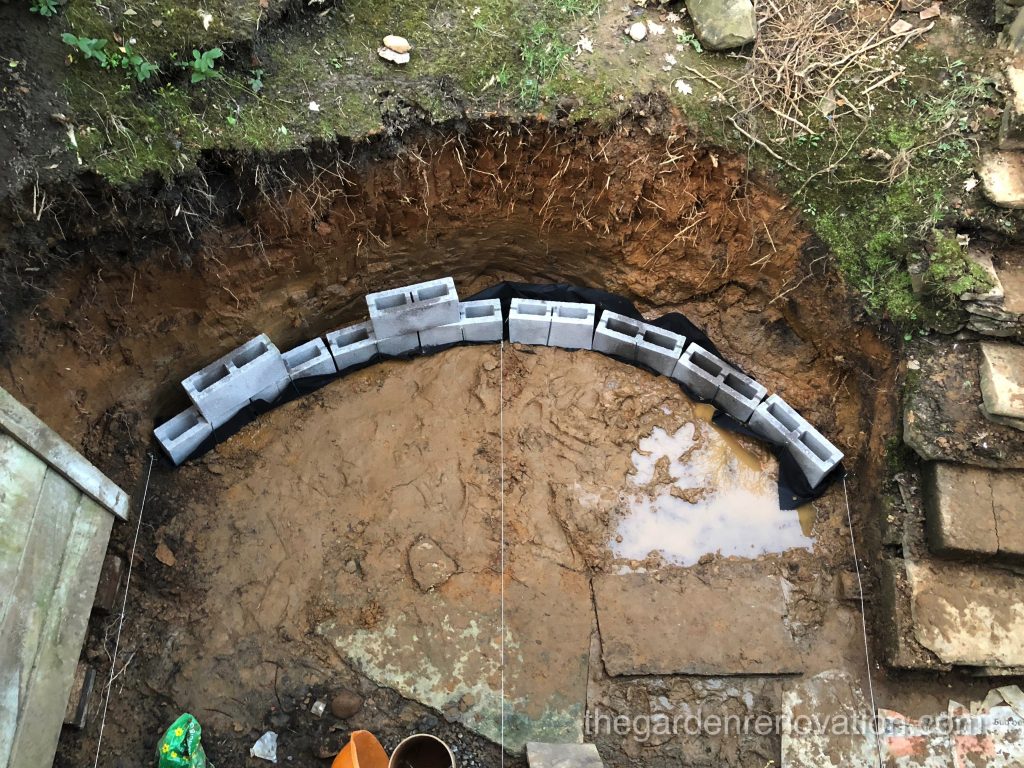
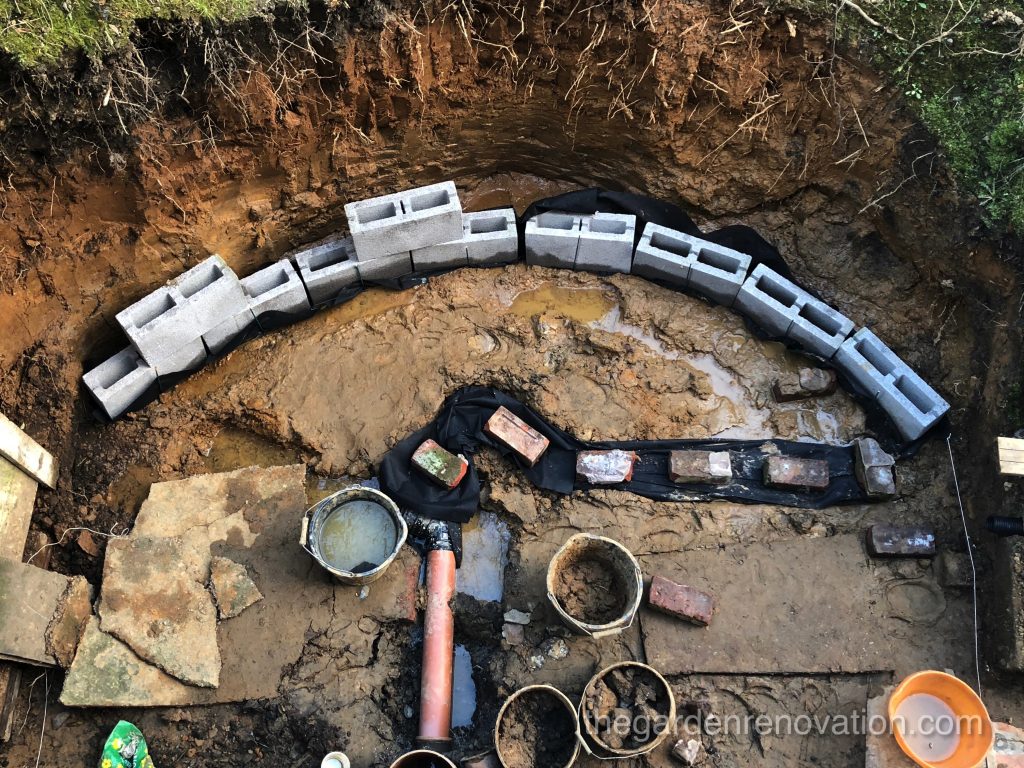
Once the water was hoovered, we dug and dug and brought more buckets up to the top part of the garden. From the bottom of the garden, it seemed like the half arc looked quite decent so we decided to stop. Then R decided that she was going to have another look from the top of the garden as this would give us a different perspective – well, this is when we discovered an unintentional advertisement for Nike. Rather than having a symmetrical arc, we’ve made a biased one. Now, in the ideal case scenario, we would dig a little bit more from one half of the arc but as we are on our limits with the earth we can fit on the top part of the garden, this was not going to happen.
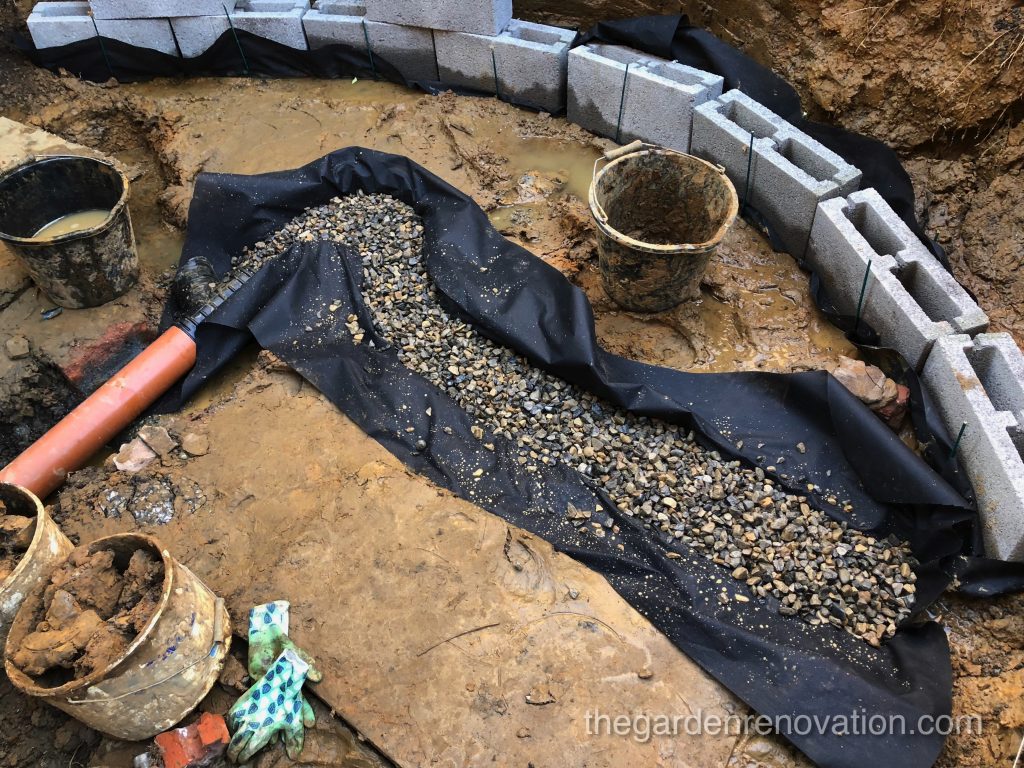
As a next step, we decided to lay loosely the concrete blocks we bought two weeks ago. We have only bought 10 and only to try and figure out the shape of our foundation for the retaining wall – we are going to order bigger quantity of the blocks online and with a delivery service once we have the ground ready for both retaining walls. Firstly, we tried to find the middle of the wall – expecting to have 270 cm from the wall of the house to the beginning of the slope. To our surprise, it was more like 230 cm. It left us puzzled for a few seconds because “we have measured and stuck a stick to mark 270 cm on top of the slope!”. A quick measurement revealed that indeed we made no mistakes with that one but we were not very consistent when digging as we dug the top of the hill deeper than we dug the bottom leaving us short of space. As a result, we dug more to straighten that up but made a compromise of setting the blocks at 245-250 cm (250 cm from the house + 14 cm for the concrete blocks + 7cm for drainage and gravel layer behind the wall).
Now that we sliced our hill half open, we observed the different layers of materials that formed it. From the top, it starts with a very thin layer of soil (something you could plant in), then it becomes one deep layer of clay. In the lower part of the slope, we have got a very dense and difficult to dig through (pickaxe is not effective at all!) layer of something that resembles clay, cement-coloured material and stones. Finally, at the very bottom, we have got some sharp sand which is very easy to dig through and falls apart in your hands. Unfortunately for us, most of the sand falls below our digging level so we cannot benefit much from that 🙁
First attempt to lay the concrete blocks and the arc looked nothing like a symmetrical arc… One exchange of opinions later, we decided to bring the arc closer towards the house. This meant decreasing the dent it was making but also limiting us to 8 concrete blocks (rather than 10 as originally calculated for the previous design). As such we proceeded and laid a quite nice half arc of the blocks. As the ground for the foundation is not levelled yet, it was not final. Also given that the edge of the slope is where the water and mud build up, we covered it with landscaping fabric before putting down the blocks. This was just to prevent the mud sticking to the blocks.

Taking about the landscaping fabric, it is one more thing that we bought online probably about three or more weeks ago. It came as a 1-meter wide roll of 20 meters in length.
Excited because we were officially done with bucketing the dirt up and down the stairs, we called it a day. We decided that on Sunday we would focus on setting up the drainage so that we could finally level up and start with paving (and finish with the mud…). Traditionally now, we have started the day with some hoovering but this time the water spillage was not that extensive (nothing directly next to the house). R decided that digging the trench for the drainage pipe was a one-man job hence she looked for something else to do and that happened to be a brick BBQ demolition. G offered to show her some chisel & hammer action and after a few hits, she knew she was not to achieve anything if she was going to continue using these tools. 10 min spent online and about 1 hour later, she managed to drive to the shop and come back with a brand new sledgehammer for the household! 😀

After R got hold of the sledgehammer, things for the BBQ were not looking good. A few hits with her new best friend and the bricks started to give way, shift and break off. One of the sides of the BBQ was two bricks wide, which allowed it to withstand more hits, but it was still relatively easy to knock it down because there was no support on either side. When R started to tear down the back of the BBQ, which was directly next to the wall separating our garden from the neighbour, it proved a little more tricky. Hitting the bricks straight on would cause them to then hit the dividing wall that we did not want to damage, so R had to approach it from different angles and regularly check that there was no contact with the back wall. As more of the BBQ back wall was coming down, it became clear that the dividing wall is in a very poor state. The top layer of bricks had not been laid particularly straight, and the concrete had not been cleaned off, so there were big chunks that had hardened out of the wall. However, the rest of the wall did not even have concrete to hold the bricks, they had simply been stacked on top of each other with nothing holding them. Probably, due to the shift in terrain these bricks now looked very uneven and unpleasant. We are not quite sure what we will do with them for the moment.

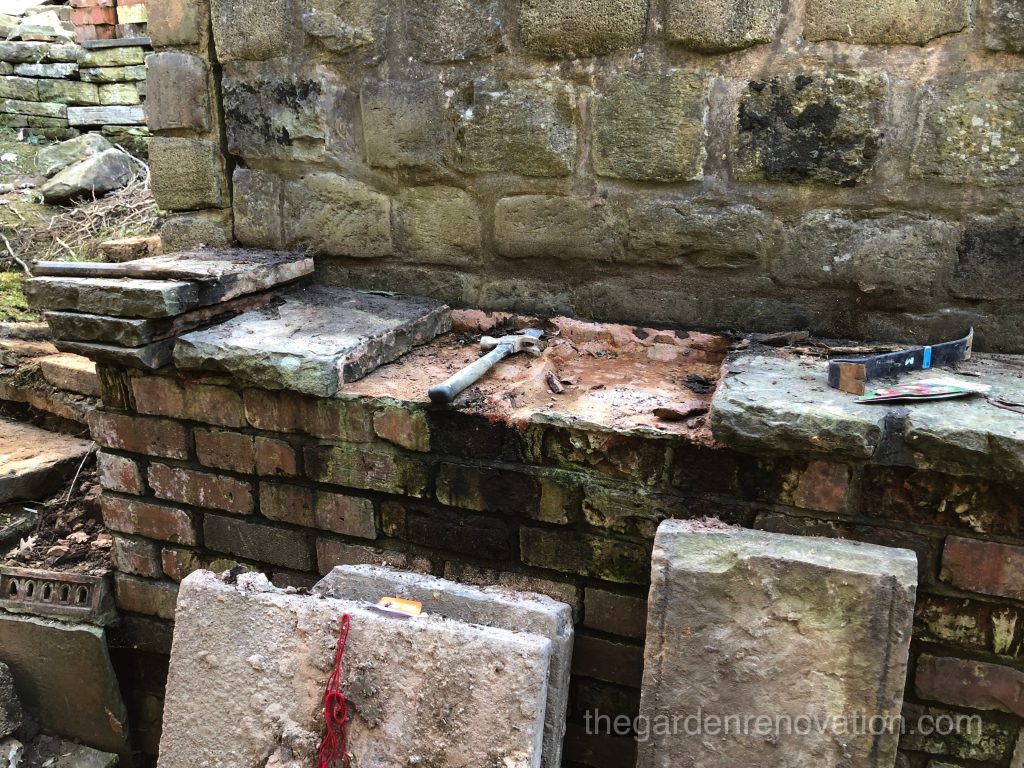
The next issue with the BBQ was linked to the retaining wall, in particular the left-hand side as it is actually part of the bricked retaining wall and had another part of the stone wall built on top of it. R could not take this out without taking out the whole retaining wall as well. Since she did not want to start demolishing the retaining wall, she instead looked at loosening up the slab stones that were used to create a ledge on the retaining wall. Since she wanted to keep these and reuse them in the new garden design, using the sledgehammer was not an option. Instead, she went back to the chisel & hammer option. The first three slabs were quite easy, in fact, the first one came off with almost no effort; the ones after that were a completely different story. Noticeably, the mortar used to attach the remaining slabs was different – much tougher. The mortar mixture was so though that the last slabs did not want to come away even when leveraged. As a result, R treated them with some sledgehammer action and with some further effort, parts of the stone slabs came loose and broke off. This was hard work and required a lot of powerful hits with the hammer on the chisel and unfortunately, some of those landed on R’s hand. I am sure that anyone with some DIY experience understands – hitting yourself with a hammer hurts a lot! Luckily there were no broken bones, but the next day there were definitely big bruises and swollen spots.
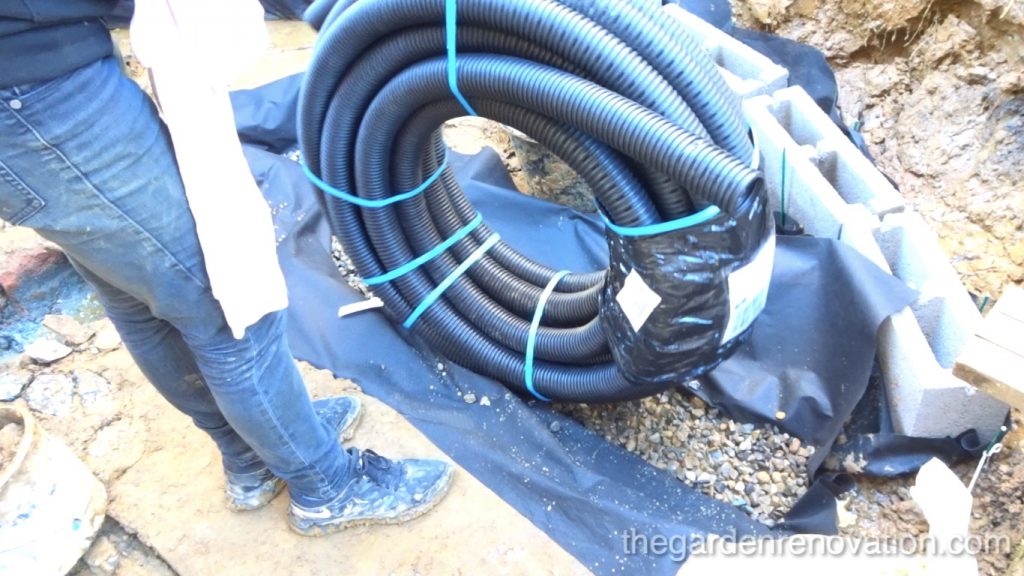
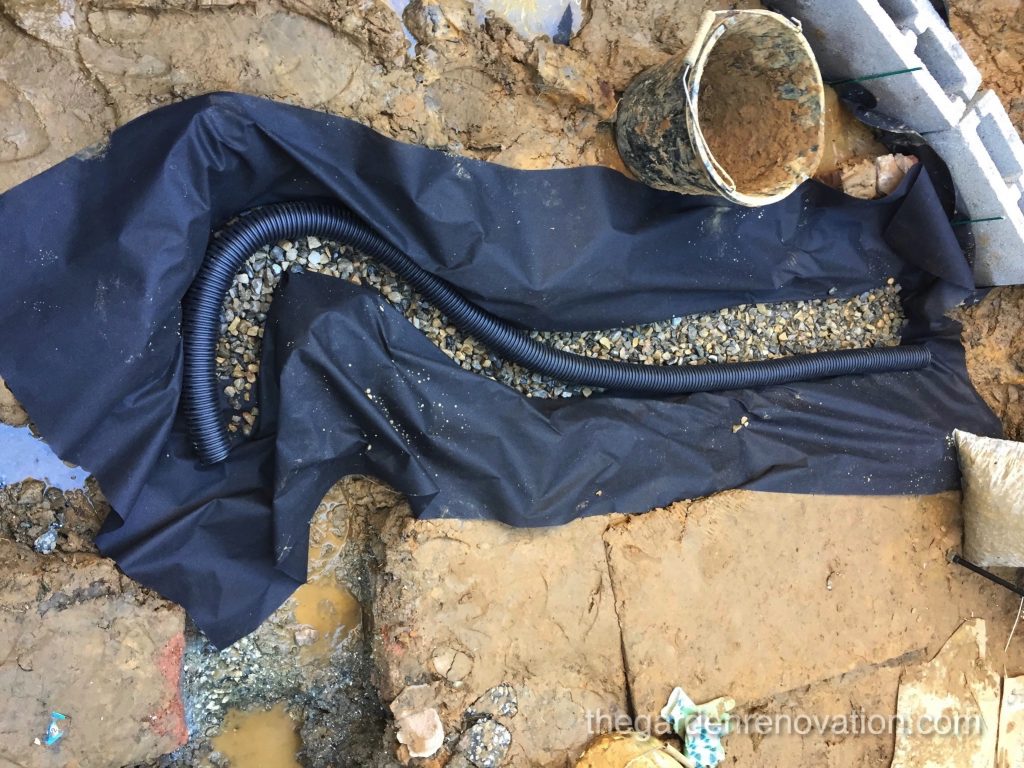
While the demolition was taking place, G made a start with the drainage layout. He dug a Y shape into the cleared area about 10cm deep, enough for the drainage pipe and gravel surrounding it to be level. Our idea for the drainage is to use a French Drainage system. This consists of a thin layer of gravel in a trench then perforated pipe on top of that and then covering the whole thing in more gravel. The gravel allows the water to flow easily and the pipe gives the water somewhere to go.The tricky part is to give the pipe or trench a slight slope towards the outflow to allow the water to flow. G read online that a 1:80 or 1:100 slope ratio is enough, so for each 100cm of drainpipe, there should be about 1cm of incline. We have ordered the drainage pipe online, together with the landscaping fabric. To be more precise, we bought 25 meters of it and we think we would need another 25 meters to complete the drainage system that would go from the first, top retaining wall all the way to the bottom draining basin… so below a picture of the pipe with R for scale!
G spent some time with the level and a straight decking plank to get the desired slope, the ground was still very muddy and soft, so making a 1-2cm slope proved very tricky. The outflow pipe is about 10cm deeper than the drain pipe so in theory even if the pipe sits level in the trench the water should drain away.
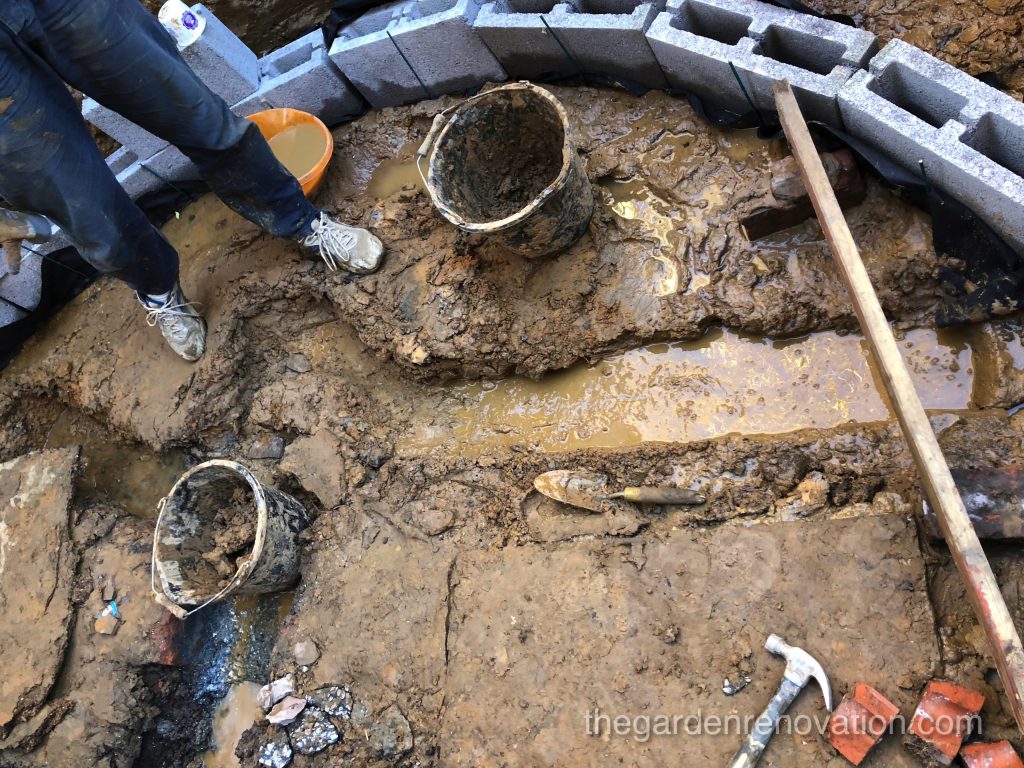
The trench was very easy to dig, and we had already agreed on the path it should follow so the rest was mostly fitting pieces together. G’s original idea was to fit a Y pipe join directly onto the outflow in order to split the drain pipe two ways. This was a good plan however, we found an old brick wall and foundation running parallel to the house that blocked the trench. The foundation was too hard to break completely even with the sledgehammer, and the pipe join would not fit in the tight space. So plan B was to connect the pipe join to a leftover 110mm orange soil pipe (which we had laying in the garden since we bought the house) and connect the soil pipe to the outflow. G cut the soil pipe to length and attached the Y join so that we got a much better idea of what the system would look like. At this point, everything was ready to be put together and R came to help. We cut a length of landscaping fabric, covered the trench with it, then spread a thin layer of gravel on top of it and finally we cut a length of drainage pipe and placed it on top of the gravel. Before covering it with gravel again we wrapped the pipe in fabric in the hope that even less dirt could get into the pipe and then covered it. To secure the connection between the orange soil pipe and the Y connector, we have used what is called “PVC pipe cement” – looks like a glue, but smells like a nail polish. We did not actually account for buying it originally but as we drove to a new shop to pick up our 10 concrete blocks, we also decided to explore the place and stumbled across this product. Once the pipe and the gravel were covered, R started to fell very cold as the temperature dropped to one degree and we thought it was a good time to stop but this was not the only reason why we decided put on hold finishing this task..
It is at this point that you always get a bit anxious. Will this actually work? Will we finally get rid of the standing water? Should we test it out, pour a load of water over it and see if it works?
Well, that is exactly what we did. We poured a bucket of water onto the earth we have been trying to keep dry, and waited. The outflow has an opening so we can easily see the water flow through it, but nothing was flowing. The water level was not dropping. Nothing was happening, in fact, the water was not even getting through to the gravel. The fabric was repelling the water, or not letting it through unless we applied some pressure or rubbed the fabric’s surface. It goes without saying that this was quite the morale hit; we were expecting the opposite result. As a result, we decided to give it some time and retired inside. But just before leaving, R had an idea to dig a small trench connecting a bigger puddle with our drain – the assumption was that if the puddle is gone then the drain has worked. Also, just in case it did not work, we had only done one arm of the Y pipe join as well. Once inside, G did some quick googling and found out that often these landscaping fabrics have a layer of water repellent chemical to make it easier to store, but after 24-48h this breaks down and water starts flowing through it. We were hoping that this also applies to the fabric we have bought!
The next morning the water level had gone down, but it was not all gone. Some water was still in puddles, considerable amount was filling the trench where we had not put any pipe. We think that the water that was now gone drained through the outflow though. G also said that he could see a small trickle of water in the outflow coming from the drain pipe so…. perhaps it was working? We will definitely have a better understanding of how it works next week, so if you are curious just like we are join us next time to find out the outcome of our drainage trial!
See you next time 🙂
To view the next article click here – Weekend 8 Demolishing Stone Retaining Wall and Garden Drainage Fail