


🌿 Our Garden Renovation: From Unusable Space to a Complete Transformation
Have you ever looked at your garden and thought “Where do I even start?” – you’re not alone. That was exactly our situation. Everything needed fixing and it was not going to be easy.
What we had wasn’t just an “old garden.” It was a mix of uneven levels, failing structures, poor drainage, and years of neglect. The kind of space you avoid rather than enjoy. The biggest constraint was access – our garden could only be reached through the main door. This meant no heavy machinery and no way to bring materials in around the house.
Simply patching things up was not an option here, we decided to do something much bigger: completely renovate the garden from the ground up – ourselves.
This website documents that journey – step by step and mistake by mistake. Eventually, success by success..
🏚️ The Garden Before: A Garden Full of Problems
Like many renovation projects, this one didn’t start with inspiration – it started with a sense of overwhelm.
Our garden had several major issues:
- Garden laid out across a steep slope
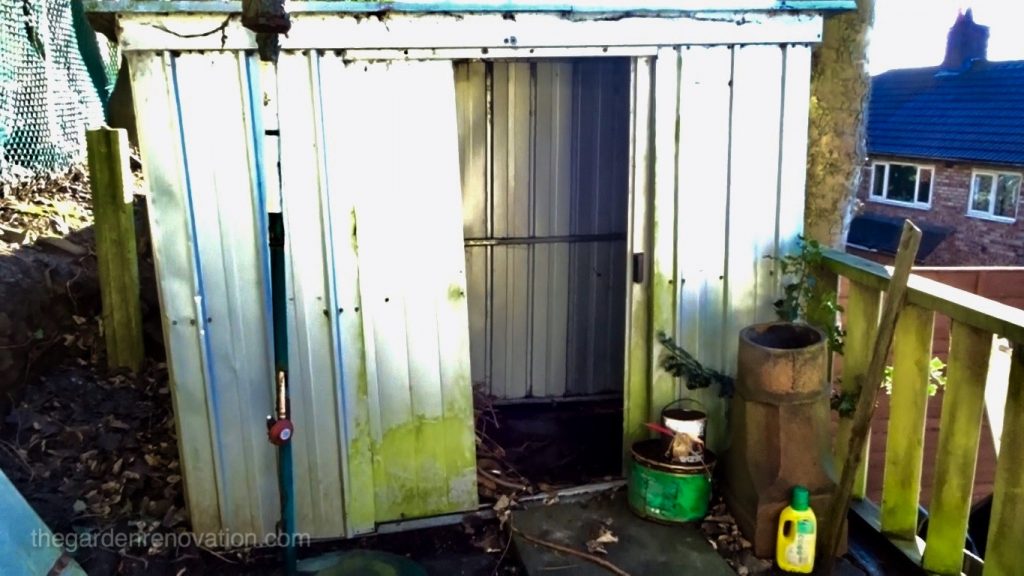
- A deteriorating metal shed taking up valuable space
- Old decking and a raised platform that had seen better days
- Uneven terrain that made the space impractical
- Drainage problems turning parts of the garden into a muddy mess
- Multiple partial and crumbling retaining walls
- Plants and shrubs growing where they really shouldn’t be
And perhaps the biggest issue: no clear plan or usable layout. And this was long before you could just upload a photo and get instant garden ideas from a choice of fee AI tools!
⚠️ The Main Problems We Faced
Once we looked closer, a few key issues became obvious.
💧 Poor Drainage
This was one of the biggest problems, and seeing how we were not located in sunny Provence but rather rainy Manchester, fixing drainage wasn’t optional – it was essential.
Some areas of the garden would become:
- muddy
- waterlogged
- difficult to walk on
Worst of all, rainwater would pool around the house and sit there for hours.
🎢 Uneven Ground and Levels
The garden was built across a steep slope, with:
- inconsistent levels
- awkward transitions
- areas that couldn’t be used properly
This made everything more complicated – from walking through the space to planning any improvements.
🧱 Old and Failing Structures
Several existing elements had reached the end of their life:
- deteriorating sheds
- crumbling stairs
- old decking
- partial retaining walls and terraces
- retaining features that no longer worked
These structures were taking up space without adding any real value.
🤸♂️ The Realisation: Strip it back and rebuild properly
We knew that fixing a bit here or replace something there will not work for this space, so we made a decision that changed everything: Strip back what we could and rebuild properly
The goal was to create a garden that was:
- shaped into terraces to create a level and easy to use space
- properly drained
- structurally sound
- and designed around how we actually wanted to use the space
🗺️ The Plan
Even though we knew which areas needed reworking, we didn’t want to start without at least a rough layout in mind. Having a structured plan from the beginning helps avoid costly mistakes and delays – this is something many garden renovation guides strongly recommend .
At that time, we both had full-time jobs (no kids though!), so our garden-renovation-time was limited to evenings and weekends only.
What we had available at the start:
- A general idea of what we wanted
- A willingness to learn
- A limited budget
- And a lot of trial and error ahead
But figuring things out as we went also gave us something valuable: real experience (including what NOT to do).
🔨 What This Project Involved
This wasn’t a simple makeover or a touch-up. Over the coming weeks, we tackled:
- Demolishing a metal shed and old decking
- Digging out large sections of the garden
- Installing drainage systems (and redoing them when they failed…)
- Laying sub-base for paving, as well as laying the paving
- Building retaining walls from scratch
- Levelling the entire garden
- Creating garden stairs, pathways, and usable zones
- Designing planting areas
🚀 Where to Start
If you’re tackling your own garden renovation, here’s the key takeaway: Start by understanding your space and its problems.
Before buying materials or jumping into work, asses the following factors:
- Climate & Microclimate (Is it mostly sunny? Windy? Do you get frost? )
- Soil Type & Quality (Is your soil mostly clay? Sandy? Loamy?)
- Purpose of the garden? (Would you like it to be kids-friendly? Do you plan on growing food? Low or high-maintenance?)
- Layout Planning (Think in zones rather than one big space. What stays and what goes?)
- Drainage (Will you need French drains? Permeable paving? Should you create rain gardens?)
- Plant Selection (Choose plants suited to your local conditions)
- Hard Landscaping (patios, decking, paths, fences, materials, durability… )
- Light & Power (Think outdoor lighting and powering your tools)
- Wildlife & Ecology (Do you mind sharing your garden with insects and small wild animals?)
- Budget & Phasing (Consider doing the project in phases and add contingency!)
- Maintenance Commitment (because a beautiful garden that you can’t maintain becomes a burden)
- Regulations & Boundaries (check property boundaries, planning permission for larger structures)
Because a garden isn’t just about how it looks – it’s about how it works. Remember that transforming a difficult, underused garden into a space that actually works is one of the most rewarding things you can do. The biggest mistake people make is jumping straight into design without understanding the space. Spend time observing, planning, and prioritising how you’ll use the garden – it will pay off massively.
And if you’re starting from a similar place: 👉 it’s absolutely possible – one step at a time.
🔗 Follow the Renovation Journey – next step:
Demolishing the shed and removing the old decking
(And trust me… it’s more work than it sounds!)
We thought we would start our journey together by showing you and explaining in detail the current state of our garden. For this purpose, we have prepared an introduction video including a tour through all elements in our garden stressing the issues we are facing. Also, given the character of our garden, it is difficult to present it to you in one photo!
Click here to open the video from YouTube or watch it below…
For those of you who like to read or scroll through pictures, but also for these who perhaps did not understand bits and pieces from the video, I have also included description of elements we went through in the video, below. So let me start…
Our garden has a lot of potential, but unfortunately, that is it for the moment. A lot of times when with friends, I tend to joke that we do not have a garden at present! There is a lot of work that we will have to put into the garden to realise its potential and that stretches from spreading some gravel here and there to building a 2-meter retaining wall.
Our house is situated on the side of a small hill, facing south-east where the hill climbs at the back of the house, meaning that when we step out of the back door it slops upwards. Given the Google SketchUp design of our garden I have made a while ago, which presents the current layout of the land (you can find it on your Homepage), the hill climbs for nearly three meters and then flattens out to a piece of lawn to the right and some decking to the left. At the very back of that, there is a raised platform made from railway slippers on which two sheds were positioned – one metal and one wooden. The fact that the garden is sloped gives it a lot of character and makes immediately interesting.
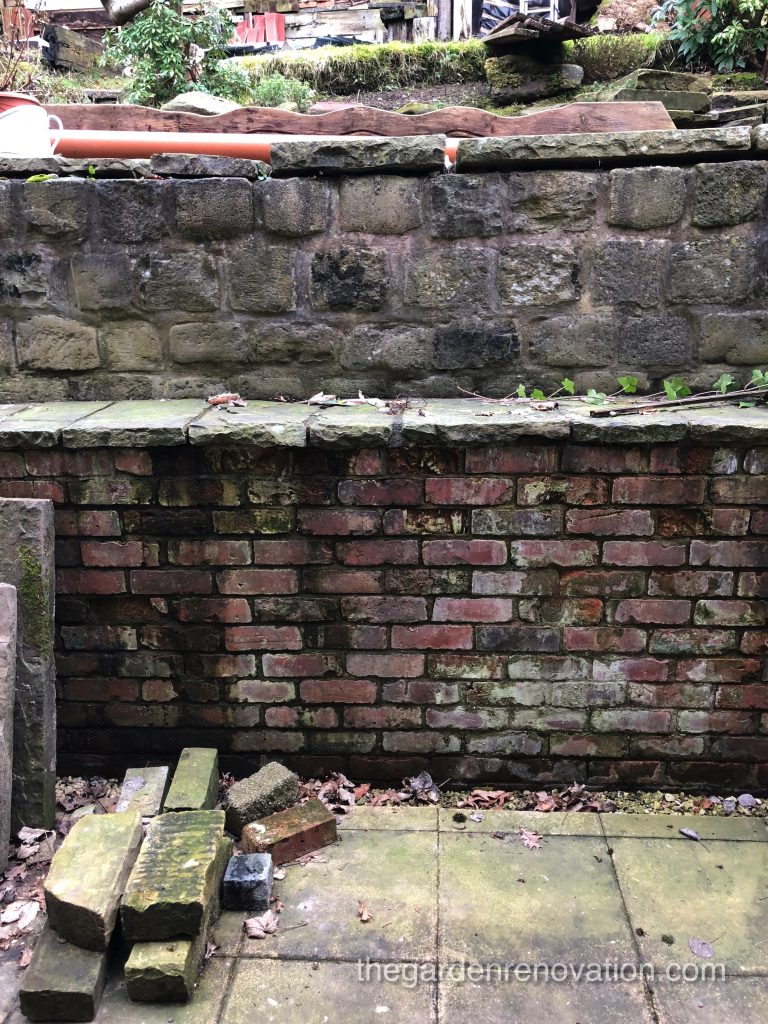
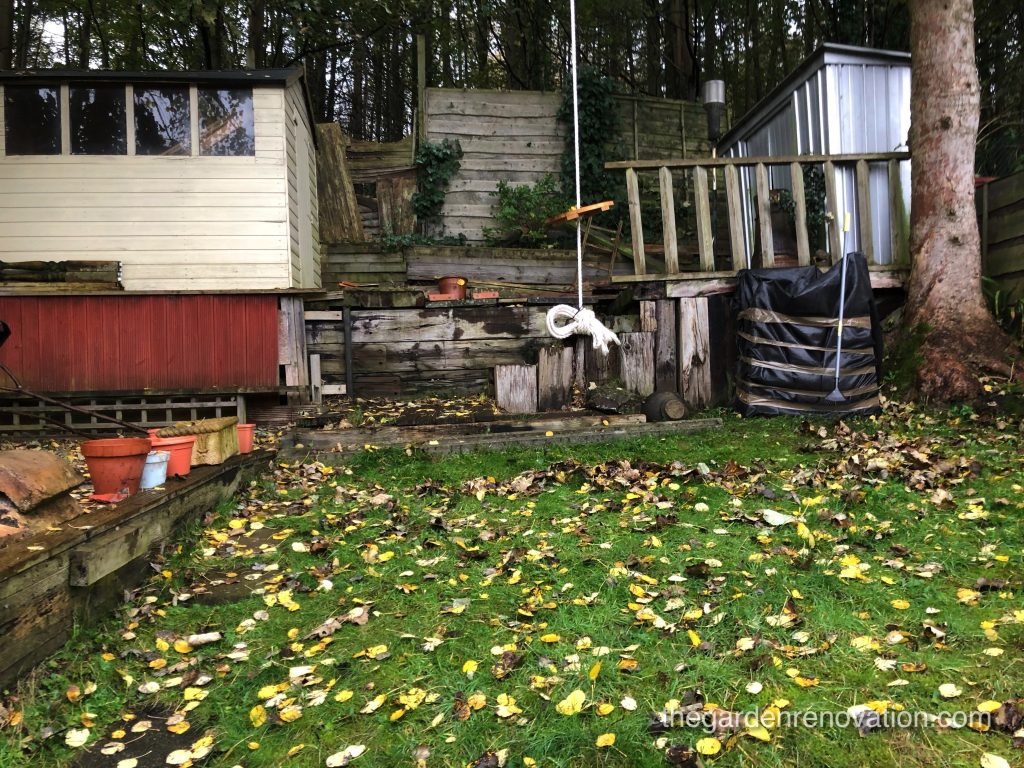
In terms of views from our house … these are not interesting 🙁 As the house was extended to the back of the garden, the sloped part starts nearly immediately (actually about 1.5-meter if to believe my Google SketchUp design!). This not only prevents the light from falling into our house but it is also not a nice view from our windows (because how would you feel if you had installed a window to your garden and your neighbour built a solid 1.5-meter wall in front of your window covering the whole view?). I guess from the start, you can already guess that in our plans is to lower down the retaining walls next to the house! 🙂
So basically with this brief description, let me tell you that all I can see from my living-room is WALL and all I can see from my kitchen is lots of earth on the slope and some rubble – photos to prove it!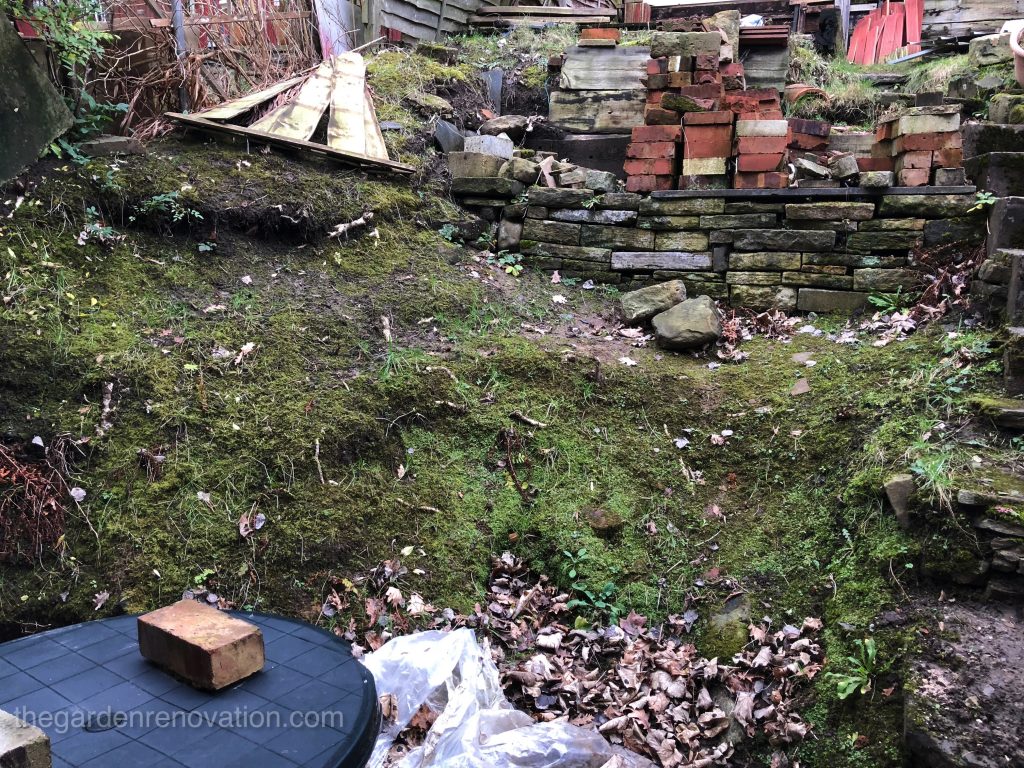
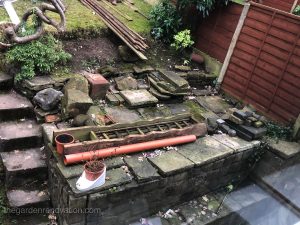
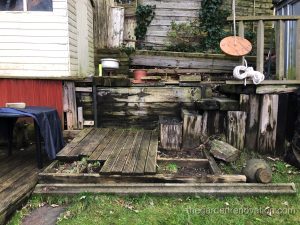
Then as I get up my (crumbling) stairs, I get to this balcony/platform. You could certainly chill there on your chair while it is sunny but I am afraid that the condition of flooring does not allow it. What you can see in the photo below is a wooden plant support frame – very decorative indeed, I am secretly hoping to be able to use it somewhere in the garden after its makeover.
At the top of the stairs, you have got the decking part and the lawn part. As a preview of what is included in the video, I can tell you that the decking is going to leave the garden as one of the first elements. Then on the right, we have got a bit of a lawn. When we moved in, it seemed to be mostly grass (we even had to mow it once! Outrageous, I know!) but then even though it makes a brilliant sunny spot, the grass turned to 90% moss. Honestly, since mowing is not required anymore, it seems we won that one. Well.. maybe we would if this part of the garden was not sloping as well! So again, in plans we have got to flatten the lawn and by doing that we will definitely cover the current moss/grass and I kid you not – plant new grass so that we can then complain that it needs mowing 🙂
One thing I did not mention in the video is our compost.
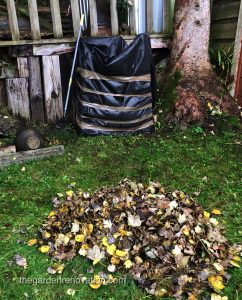
Do you see how it looks? Yea, I know but rest assured it is 100% temporary! When we got the property, I have loudly announced to everyone that we are going to wait a year before renovating the garden to check which spots in the garden are the sunny ones past 4 pm (so once we are back from work – what a brilliant idea! I recommend everyone to do so). Keeping this idea in mind, we have decided that it will not hurt us to set up a temporary, one-year compost. To do that, we grabbed the black cover/membrane that was covering the earthy slope and then we also gathered 4 wooden decking planks – at the time they were just lying loosely in the garden. We dug 4 relatively shallow holes, stuck the planks in them, wrapped the black membrane around the poles and finally  secured it with brown tape (I said it was temporary!). We started with adding some cut grass from the garden, lots of fruits/veggies from our green bin, the leaves from the trees I pruned and in autumn we topped it up with fallen leaves, as well as Halloween pumpkins!
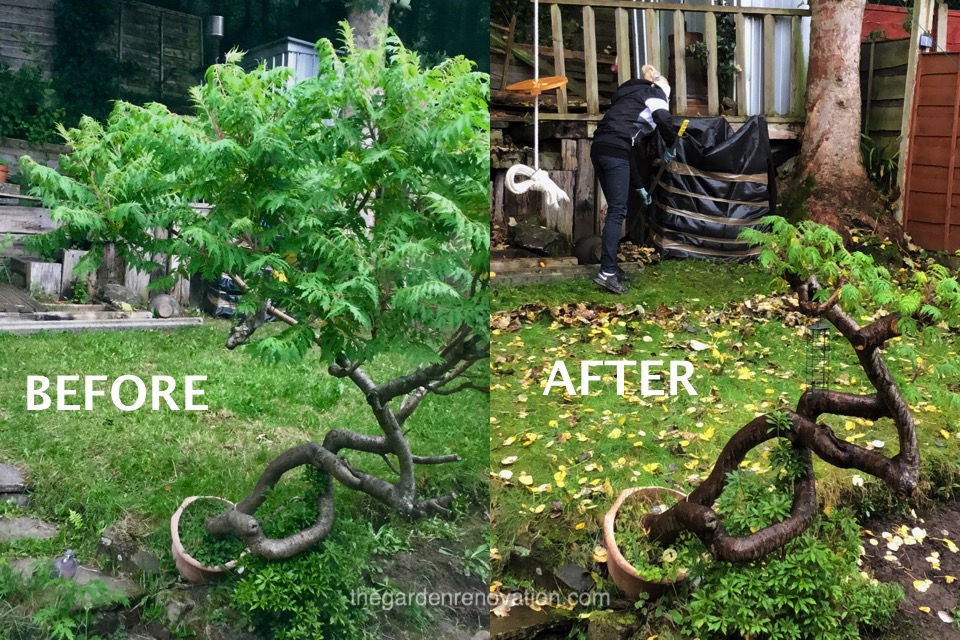
Talking about pruning the tree.. that is somewhat a lie. I encourage you to watch the video to understand why I did what I did to the tree, but rest assured that the fate of this tree is not decided yet!
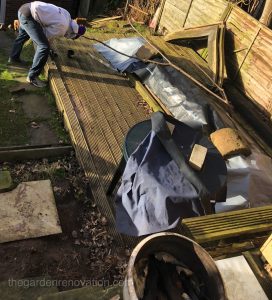
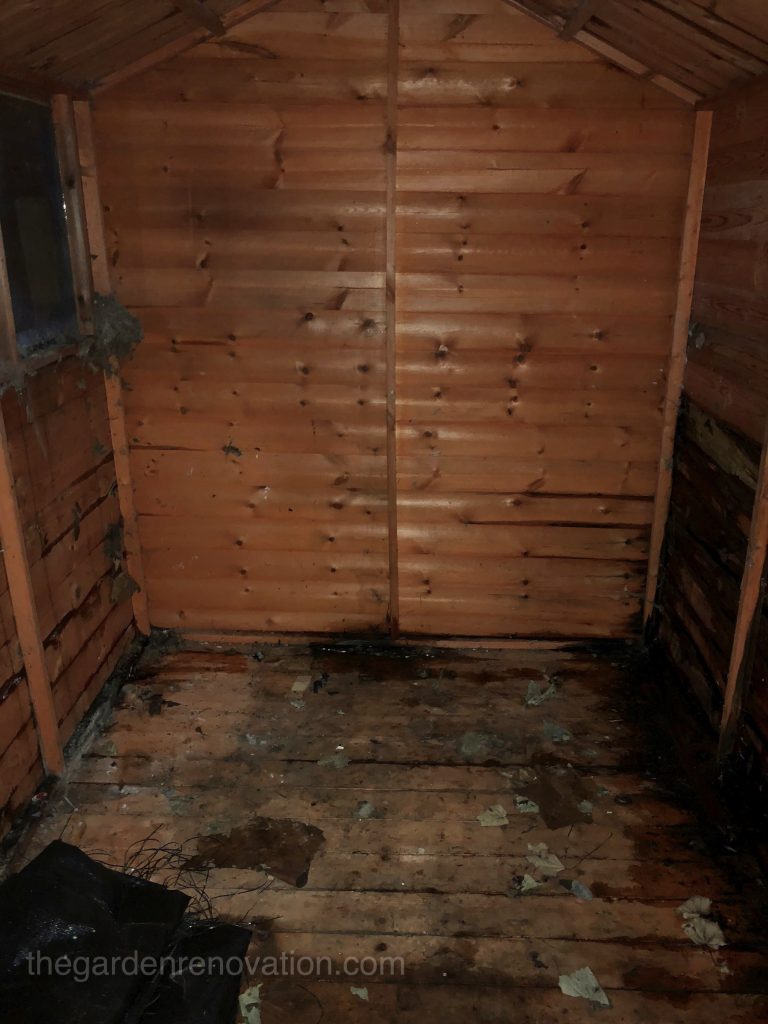
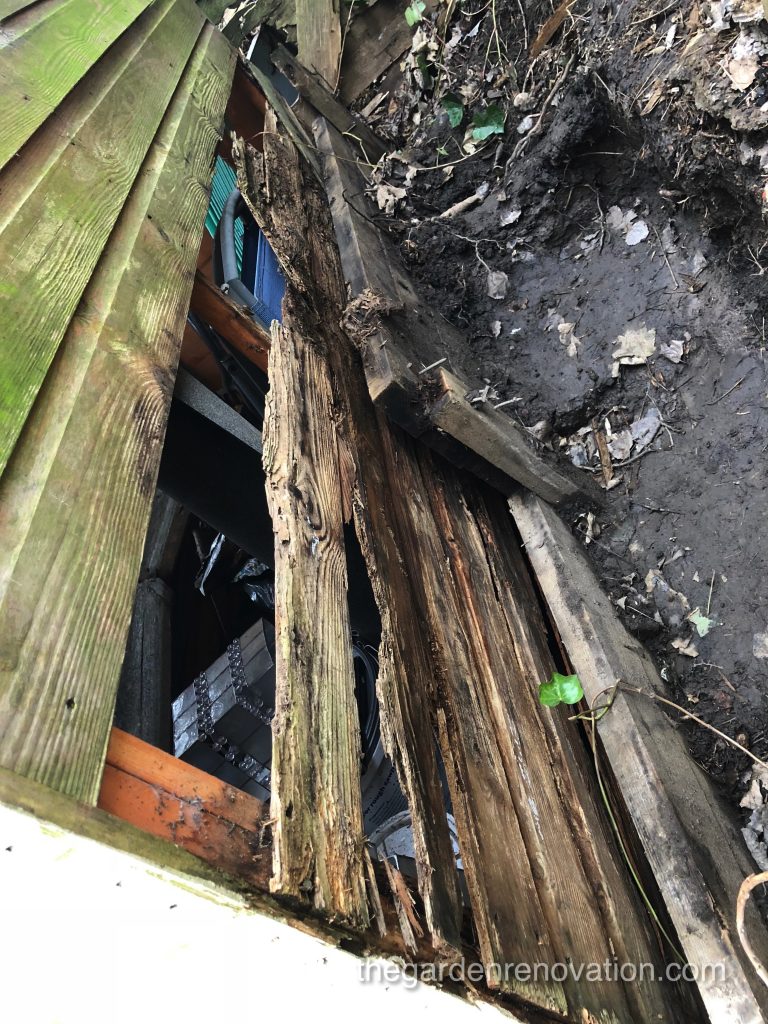
As mentioned at the beginning, at the very back of our garden, we have got a wooden platform with two sheds on it.
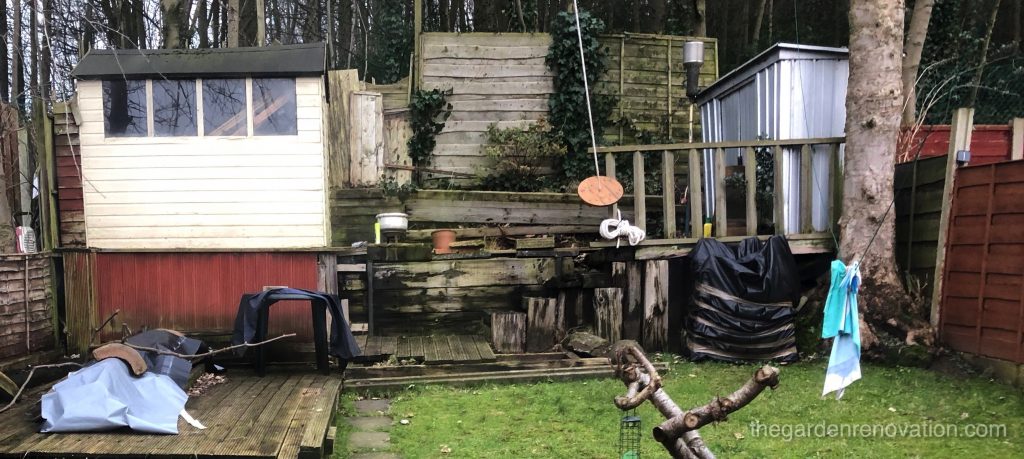
The wooden platform, which is 1.35-meter high holds nearly 2 meters of earth – already asking for trouble. That’s why our initial idea was to take down the majority of the platform and only leave the part needed for the wooden shed as it seemed in good condition (the shed that is, not the platform). Recently, we have discovered that the platform together with the shed are leaning and therefore we might need to get rid of it all if we cannot rescue any of it!
P.S. If you would like to see the garden design without the platform, feel free to check out the video! I have also included some guide of how I got rid of spiders in the shed 🙂

I would like to keep it relatively short so I will finish this post here but let me give you the preview of the next post and the video. We will be:
- Undoing the decking!
- Undoing panelling from the platform to discover what’s under it!
- Re-sorting, cleaning and recycling the wood gathered during the process!
- Taking down the metal shed (YAAAAAAAY!)
So at this point, I would like to thank you for starting this journey with us and if at any point you start wondering why on earth we got ourselves the property with garden in such state, then I am probably better off telling you now that the house itself feels more spacious than a typical English house and having no neighbours peaking at our back windows is nearly invaluable to us!
See you next time 🙂
Checkout the next article Weekend 1- Demolishing Metal Shed And Partially Removing Decking.
I got what you intend,saved to my bookmarks, very decent website .