


Welcome back!
On Saturday it was raining again. That being said, this time we did not miss the whole weekend because on Sunday the weather was OK (except from 3 seconds of hail where R ran to put away the camera to then realise that the hail was over). The rain, however, created an opportunity for us to make a trip to a DIY shop where we got some new garden supplies … like pickaxe! It cost us about £20 and while initially, R was very reluctant to spend this money on this type of tool now she thinks it was the best decision ever!
Excited about the purchase, we could not hold until Sunday so we cracked on digging the same day. The pickaxe came in two parts, the plastic handle and the steelhead, so before we could start using it we had to put it together. It is quite surprising that all that needs to be done to safely secure the head onto the handle is to slide the head onto the handle from the bottom and then tap (more like slam) the top end of the pickaxe on a hard surface. This will jam the steelhead into the handle and prevent it from sliding back down the handle on your hands when being used. Of course, we had to google and check on YouTube how this was done to make sure we weren’t going to cause ourselves any harm.
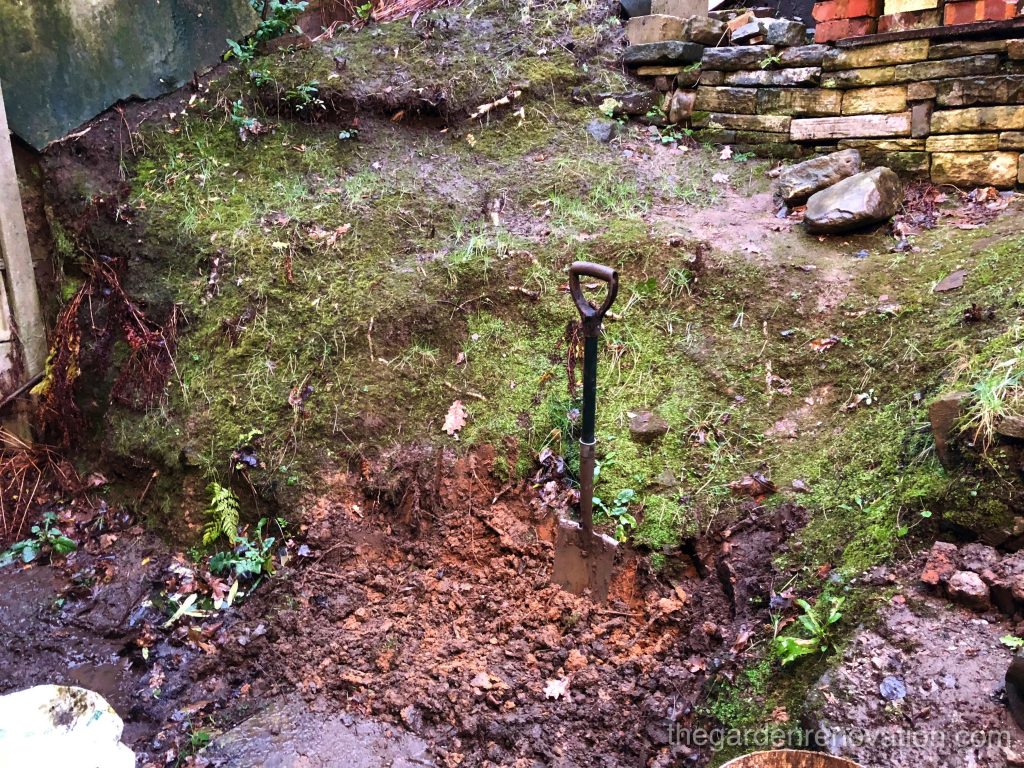
And now let us explain why we moved from one end of the garden to the other and what we are exactly trying to achieve… Now that it is winter and it is raining nearly every day for the whole day (no jokes), we are getting puddles of water in our back garden, right next to the house. The puddles are not only making the area very muddy but also loosening our paving slabs – which at this point became dangerously unstable. We have observed that the paved area on the right never gets flooded therefore we decided to lay and extend the paving to the other side of the house exactly in the same way. In other words, we have figured out that at this point we might be better off fixing the bottom of our house rather than focusing on the back (the platform)!
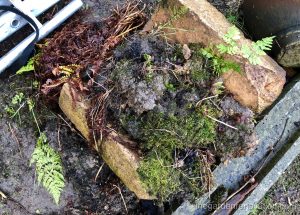
For the rest of Saturday, it was still raining meaning that we could not put the camera out but just to get a taste of what we were busy with, R positioned the camera behind our kitchen door and left it going for a few minutes. R really likes our wild ferns that grow on the hill, so she spent a bit of time carefully removing them from the side to save them and feature them into the new garden layout. Since ferns really like wet and shady areas, they have been growing really nice on this small hillside – in the shade of the house and with the wetness of English weather. In the spring and summer, when they are at their fullest with their bright green and thick foliage they make the place look great.
That day, she has also managed to move away half of our compost with the sole purpose of moving the soil from the platform to the lawn easier.
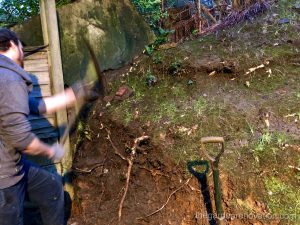
Back to digging. Thanks to the pickaxe we quickly generated a lot of loose earth, so G started moving it into our trusty 10-litre paint buckets, and emptying them on our designated earth pile. As a side note, carrying two 10-litre buckets full of muddy clay up a set of stairs a few dozen times gives you a pretty good leg work out, try it :). After R safely moved the fens she came to help me move the buckets up and dig into the side of the hill. We took turns using the pickaxe to loosen the earth and bring the buckets up to the top. It is a really tiring job, the pickaxe is heavy, the buckets are heavy, you get stuck in the muddy clay and you are cold. So after just a couple of hours, when the weather took a turn for the worse we decided to call it a day and retreated inside. That day, we did not make any major discoveries but we did make a right mess next to the house!
During the day, we had taken a look at how the paving had been done on the right-hand side of the house. We discovered that there was about 5cm of some kind of concrete mixture, and the paving stones were laying on top of it. This technique matched with what we found on the internet. As a result, we decided that we would buy some gravel to help with the drainage and then a couple of things required to make a mortar mixture – four parts sharp sand and one part cement; apparently, this is the magic recipe for slab paving.
On Sunday morning we had some personal matters to attend, and while we were out and about with the car we took the chance to go to the DIY store (again!). At the store, we got six bags of 20mm gravel rock, and four bags of sub-base. Sub-base is a mixture of rocks ranging from 5mm to 40mm, and they are meant to interlock with each other and not roll around like pee gravel. We got the gravel to help with the drainage and we got the sub-base to try it out and also to see if it is a good alternative to gravel for drainage. Once at home we got back to digging and levelling out the area just outside the back door.
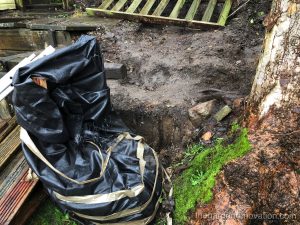
Things were going well, we’d managed to remove enough dirt from the right-hand side that we decided to start levelling the space right outside the door, in order to try the gravel and sub base. That’s when we hit something hard. There was a thin layer of some reddish sand-stony mixture, and just below that a 7cm thick concrete slab. The pickaxe made an easy work of the sandstone mixture, but the concrete slab was a different story. For a moment we thought that perhaps this was part of the foundations of the extension, but then we noticed that there a was a gap between the house and the concrete slab, and also it had edges. So G spend some time with the hammer and chisel to loosen up the slab and eventually it was free from its reddish mixture.
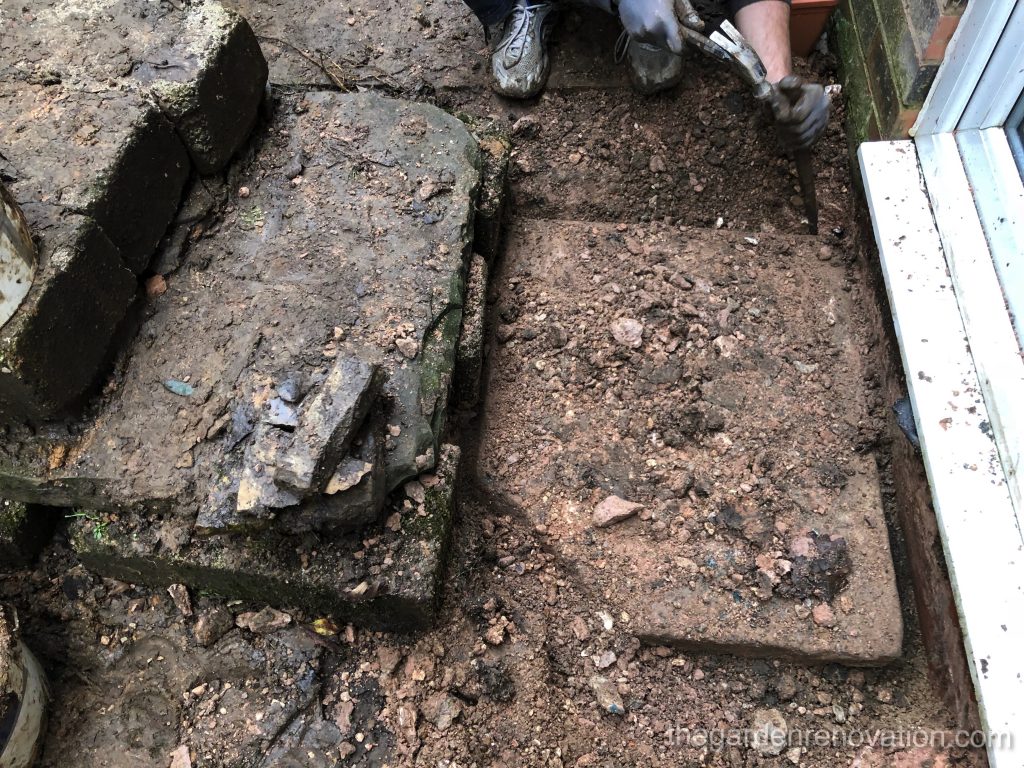
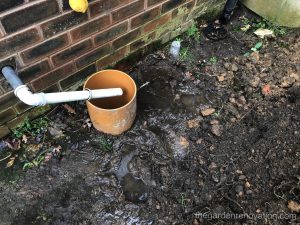
There was no chance that we could lift the slab, even together, so we just raised it on one of its sides and rolled it out of the way. A bit further down to the left of the stairs we found monster slab’s cousin, this time hidden under a layer of clay. It was a lot easier to free up and wheel it out of the way since it was just encased in clay soil. After that levelling was much easier, we cleared and level the area just in front of the house and were ready to try to improve the drainage. To our surprise, the drainage pipes are not buried deep into the ground therefore as we were trying to clear out the area, we have also found the pipes!
While G was chiselling out the slab we kept all the chips and small rubble that was coming out of it, because it looked very similar to the sub-base. We initially thought we could save some money and recycle these into our own sub-base. After we spread out all the rubble to make it level with the existing paving area, we tried to compact it by hitting a log over it. Quite quickly, it became clear to us that this recycled gravel/rubble had not been a good idea. As we were stepping on it we could see and feel the whole thing shifting and moving under our weight so it didn’t seem like it would make a nice base for our slabs. As a result, we took it all out again. It was a shame, but at least we tried 🙂 .
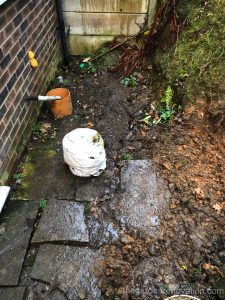
So next we tried the sub-base we had bought earlier in the day. We only did the small area in front of our door, which took two bags of the sub-base. This was just to give it a test and see if it moved and shifted the same as the rubble we had just taken out. We only put a thin layer of it but were already quite surprised how little movement we observed when stepping on it. At this point, it was already getting dark, and we were getting cold, so we packed up all our tools and retired for the day.
We hadn’t expected to be able to do much because of the weekend full of rain but in the end, we were actually really pleased with the progress!
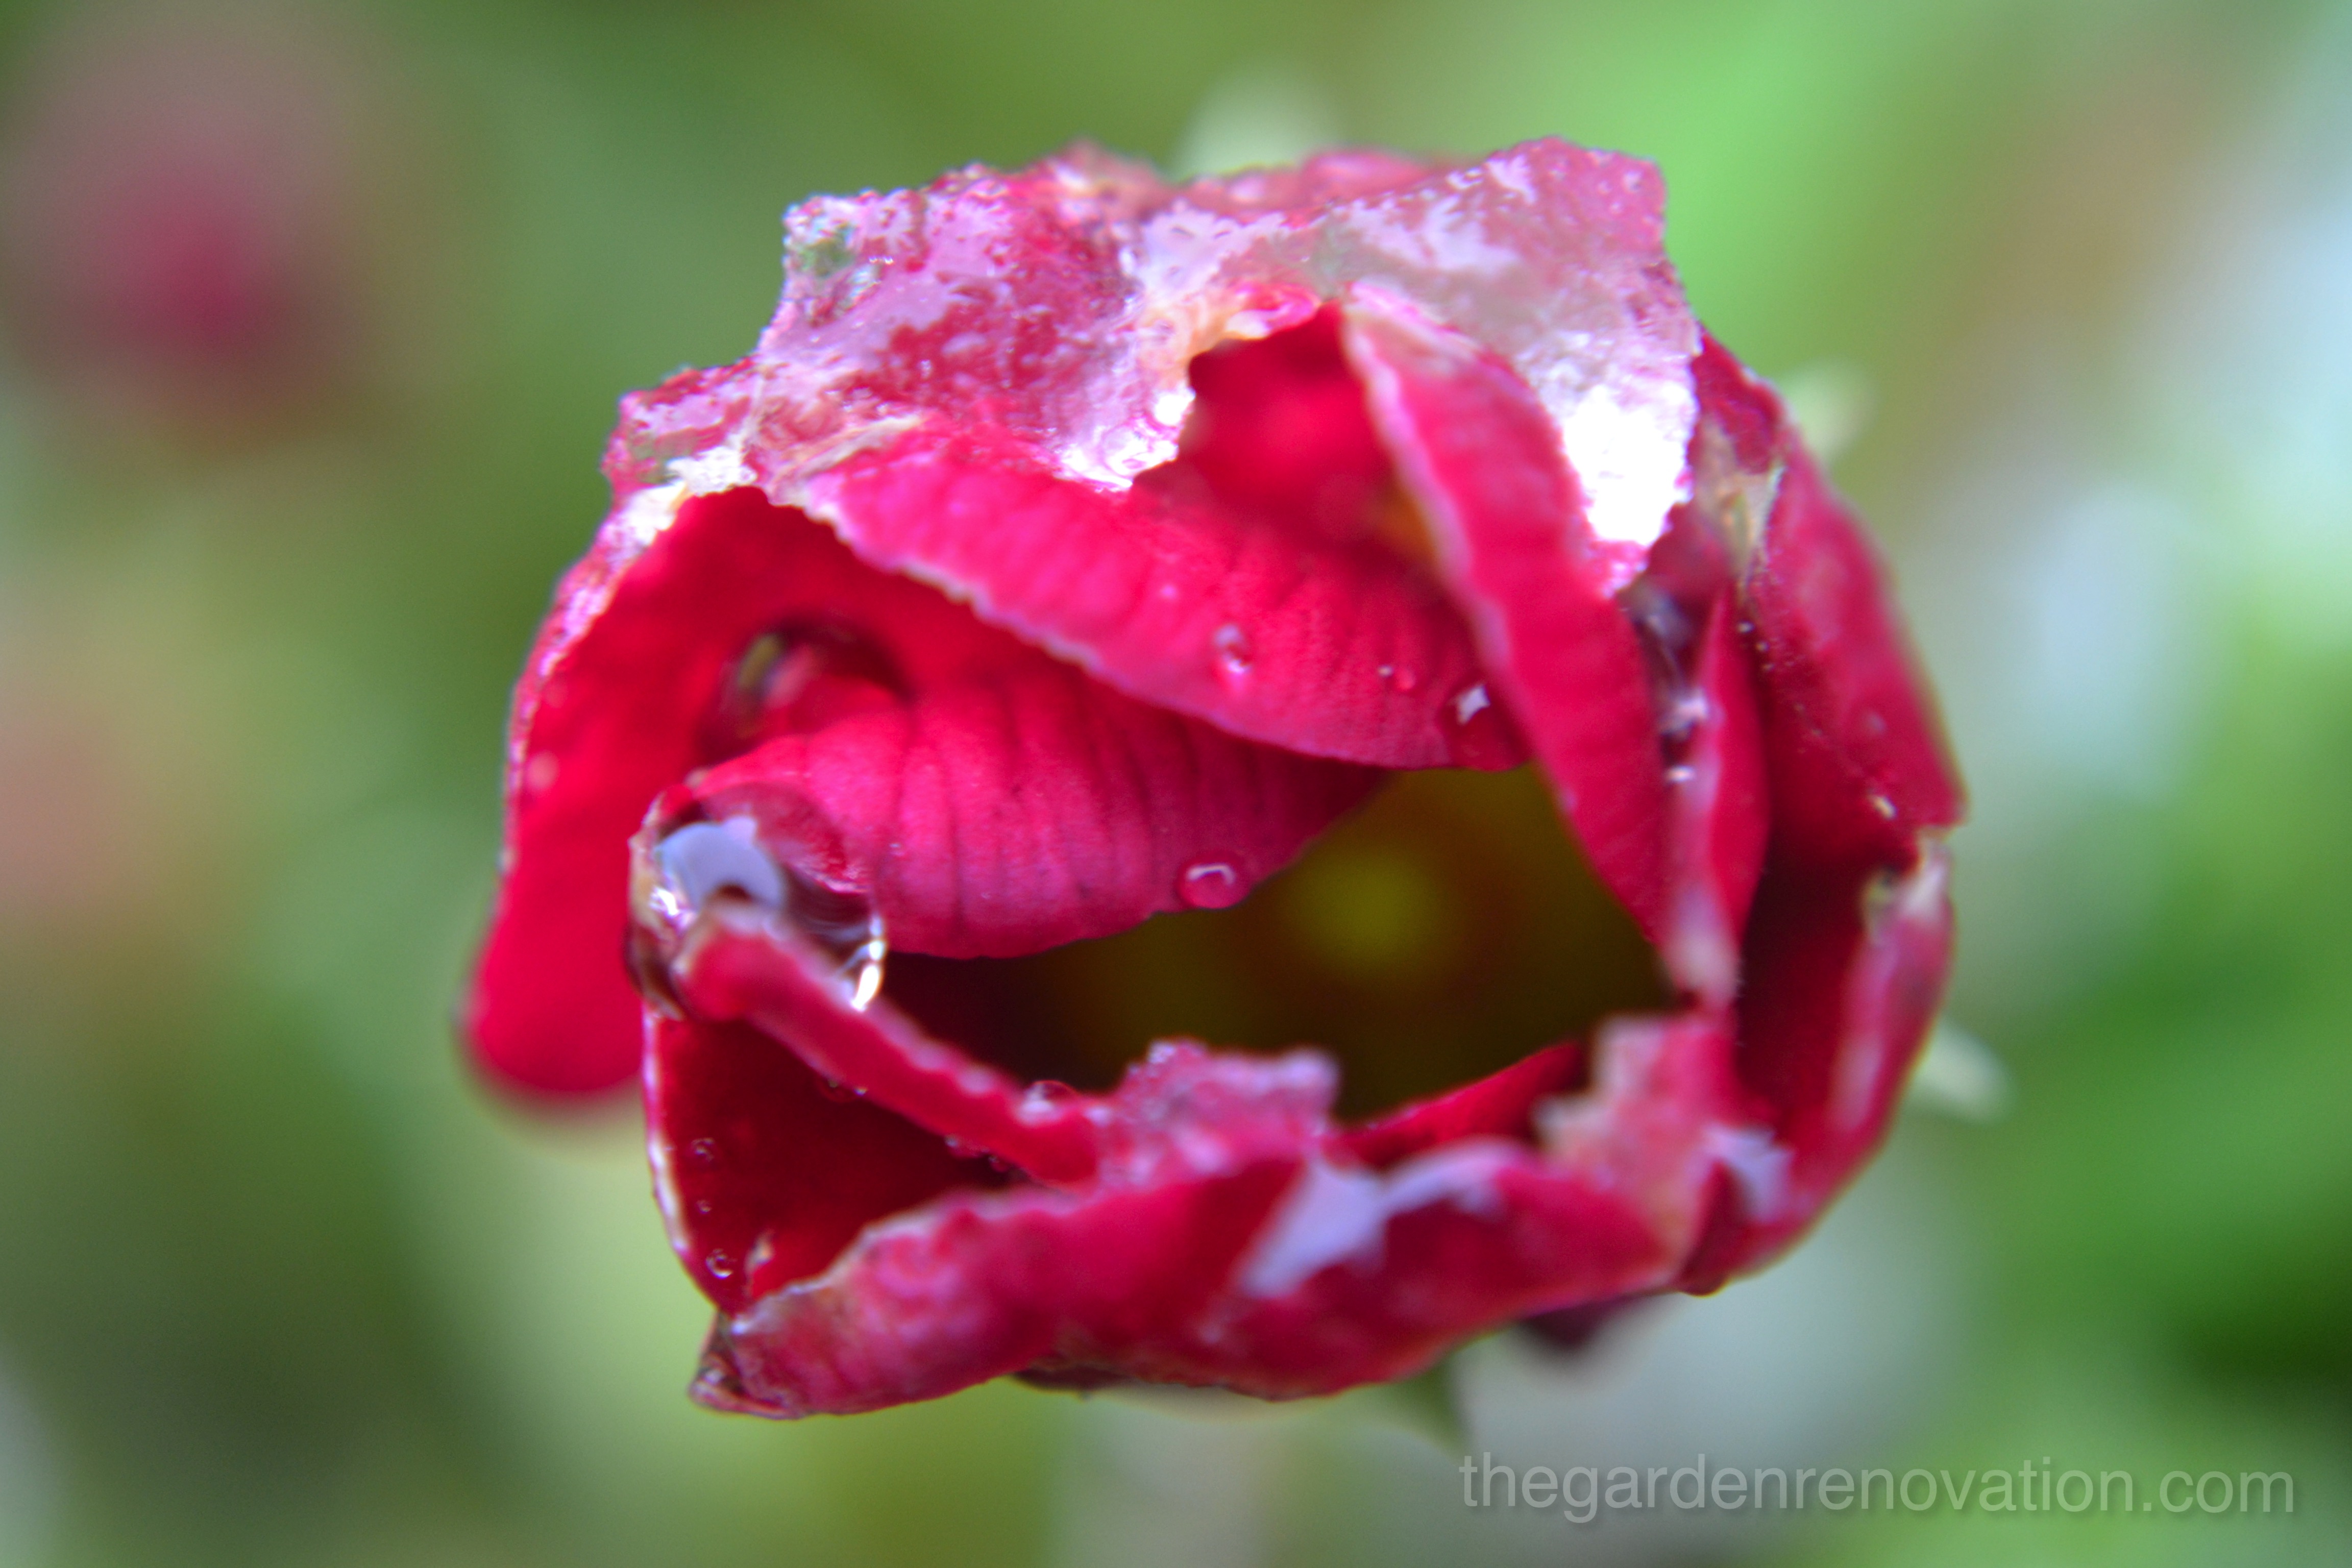
Bonus photo:
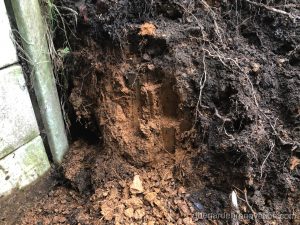
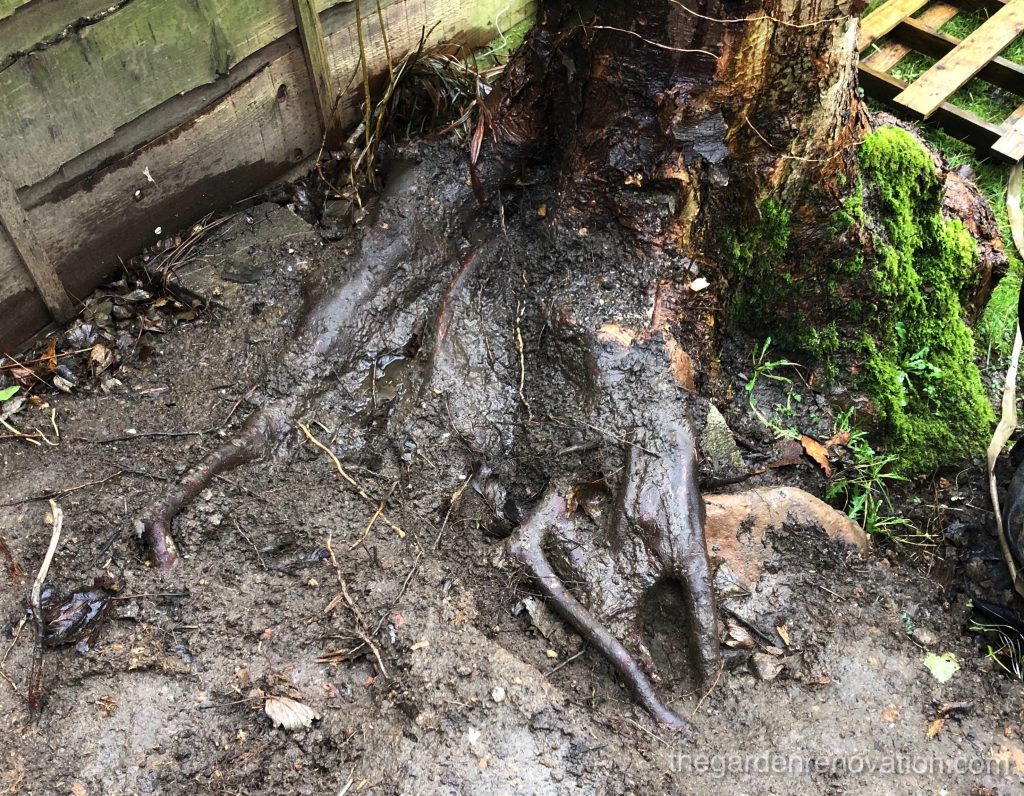
After a week of intense rain, as expected, the water started to wash away the dirt from in between the tree roots which undercovered a better view on the complexity of the roots…
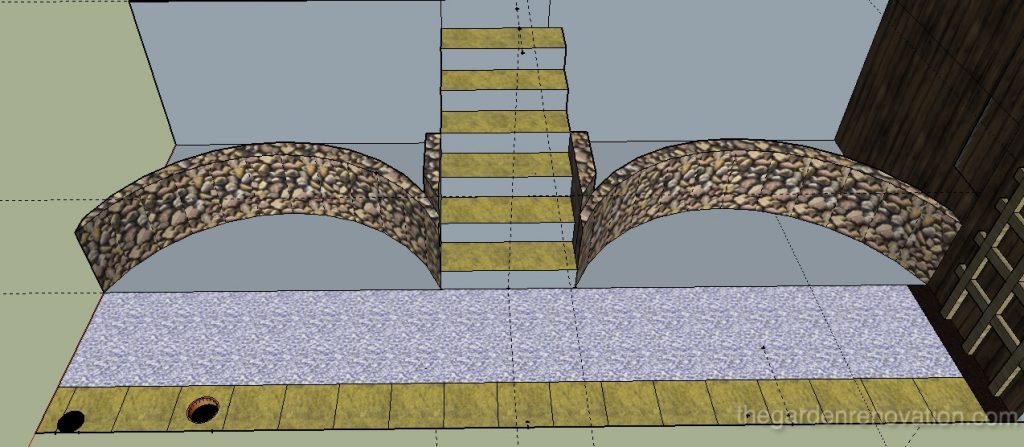
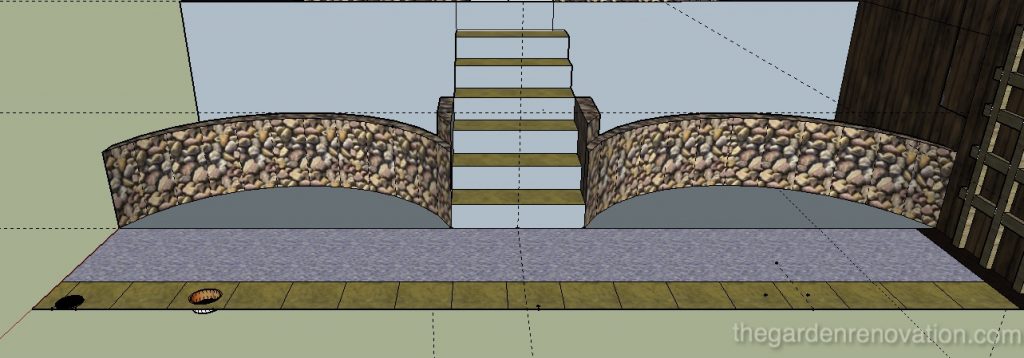
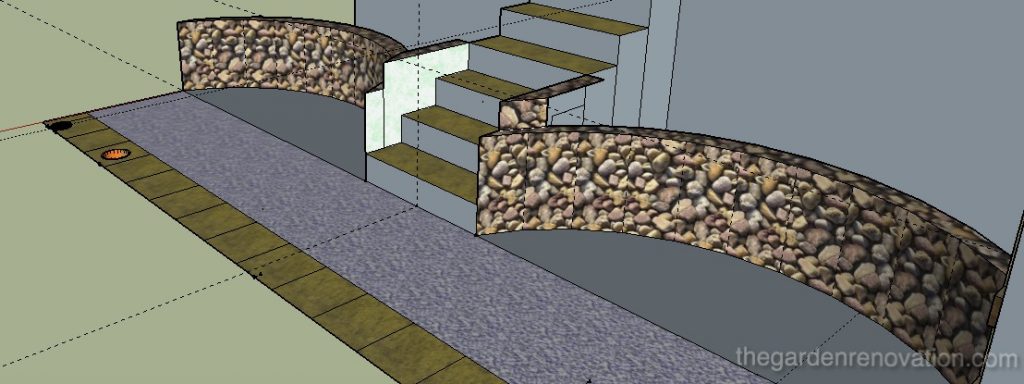
In the video, we have also partially shown the new design for the bottom of the garden where R gave some commentary. If you would like to know more details, feel free to watch the video, otherwise, there are just a few screenshots of the new layout below.
See you next time 🙂
Check out the next article – Weekend 5 – Digging for the first retaining wall.